Targeting Workflow
The targeting workflow takes you from a broad set of flagged entities down to a prioritized, actionable list — with a report or data export ready at the end. This guide uses the Revenue Assurance workspace as the example, but the same steps apply in any Trade Enforcement Suite workspace.
Step 1: Navigate to the workspace
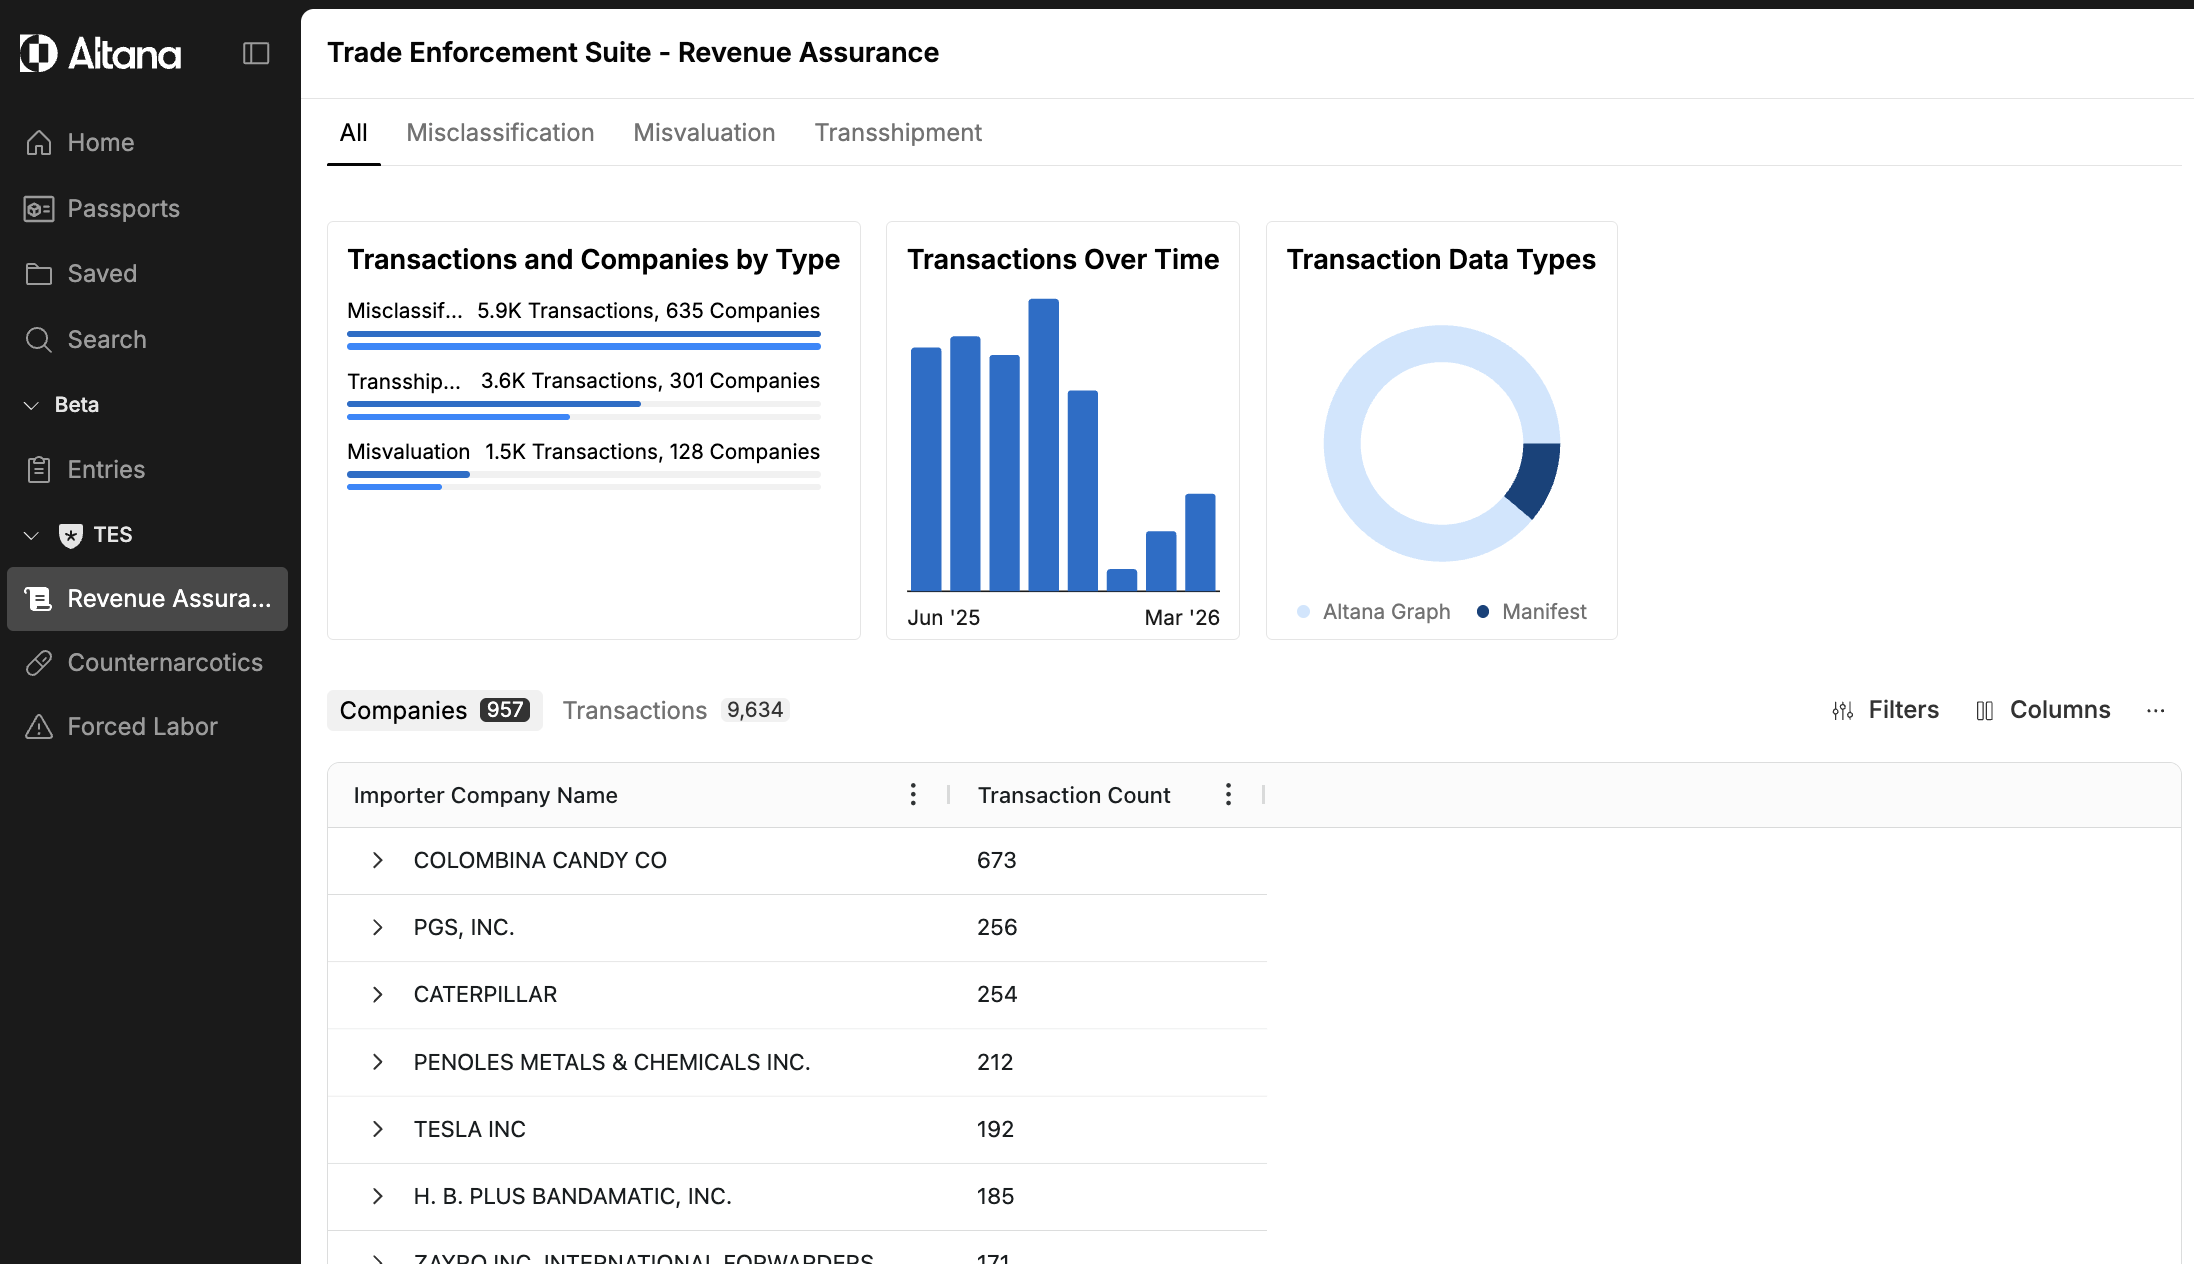
From the left navigation, open the TES section and select the workspace you want to work in. In this example, select Revenue Assurance. The workspace opens to a summary view showing companies and transactions across all available risk vectors, with charts giving a high-level picture of the data distribution.
Step 2: Select a risk vector
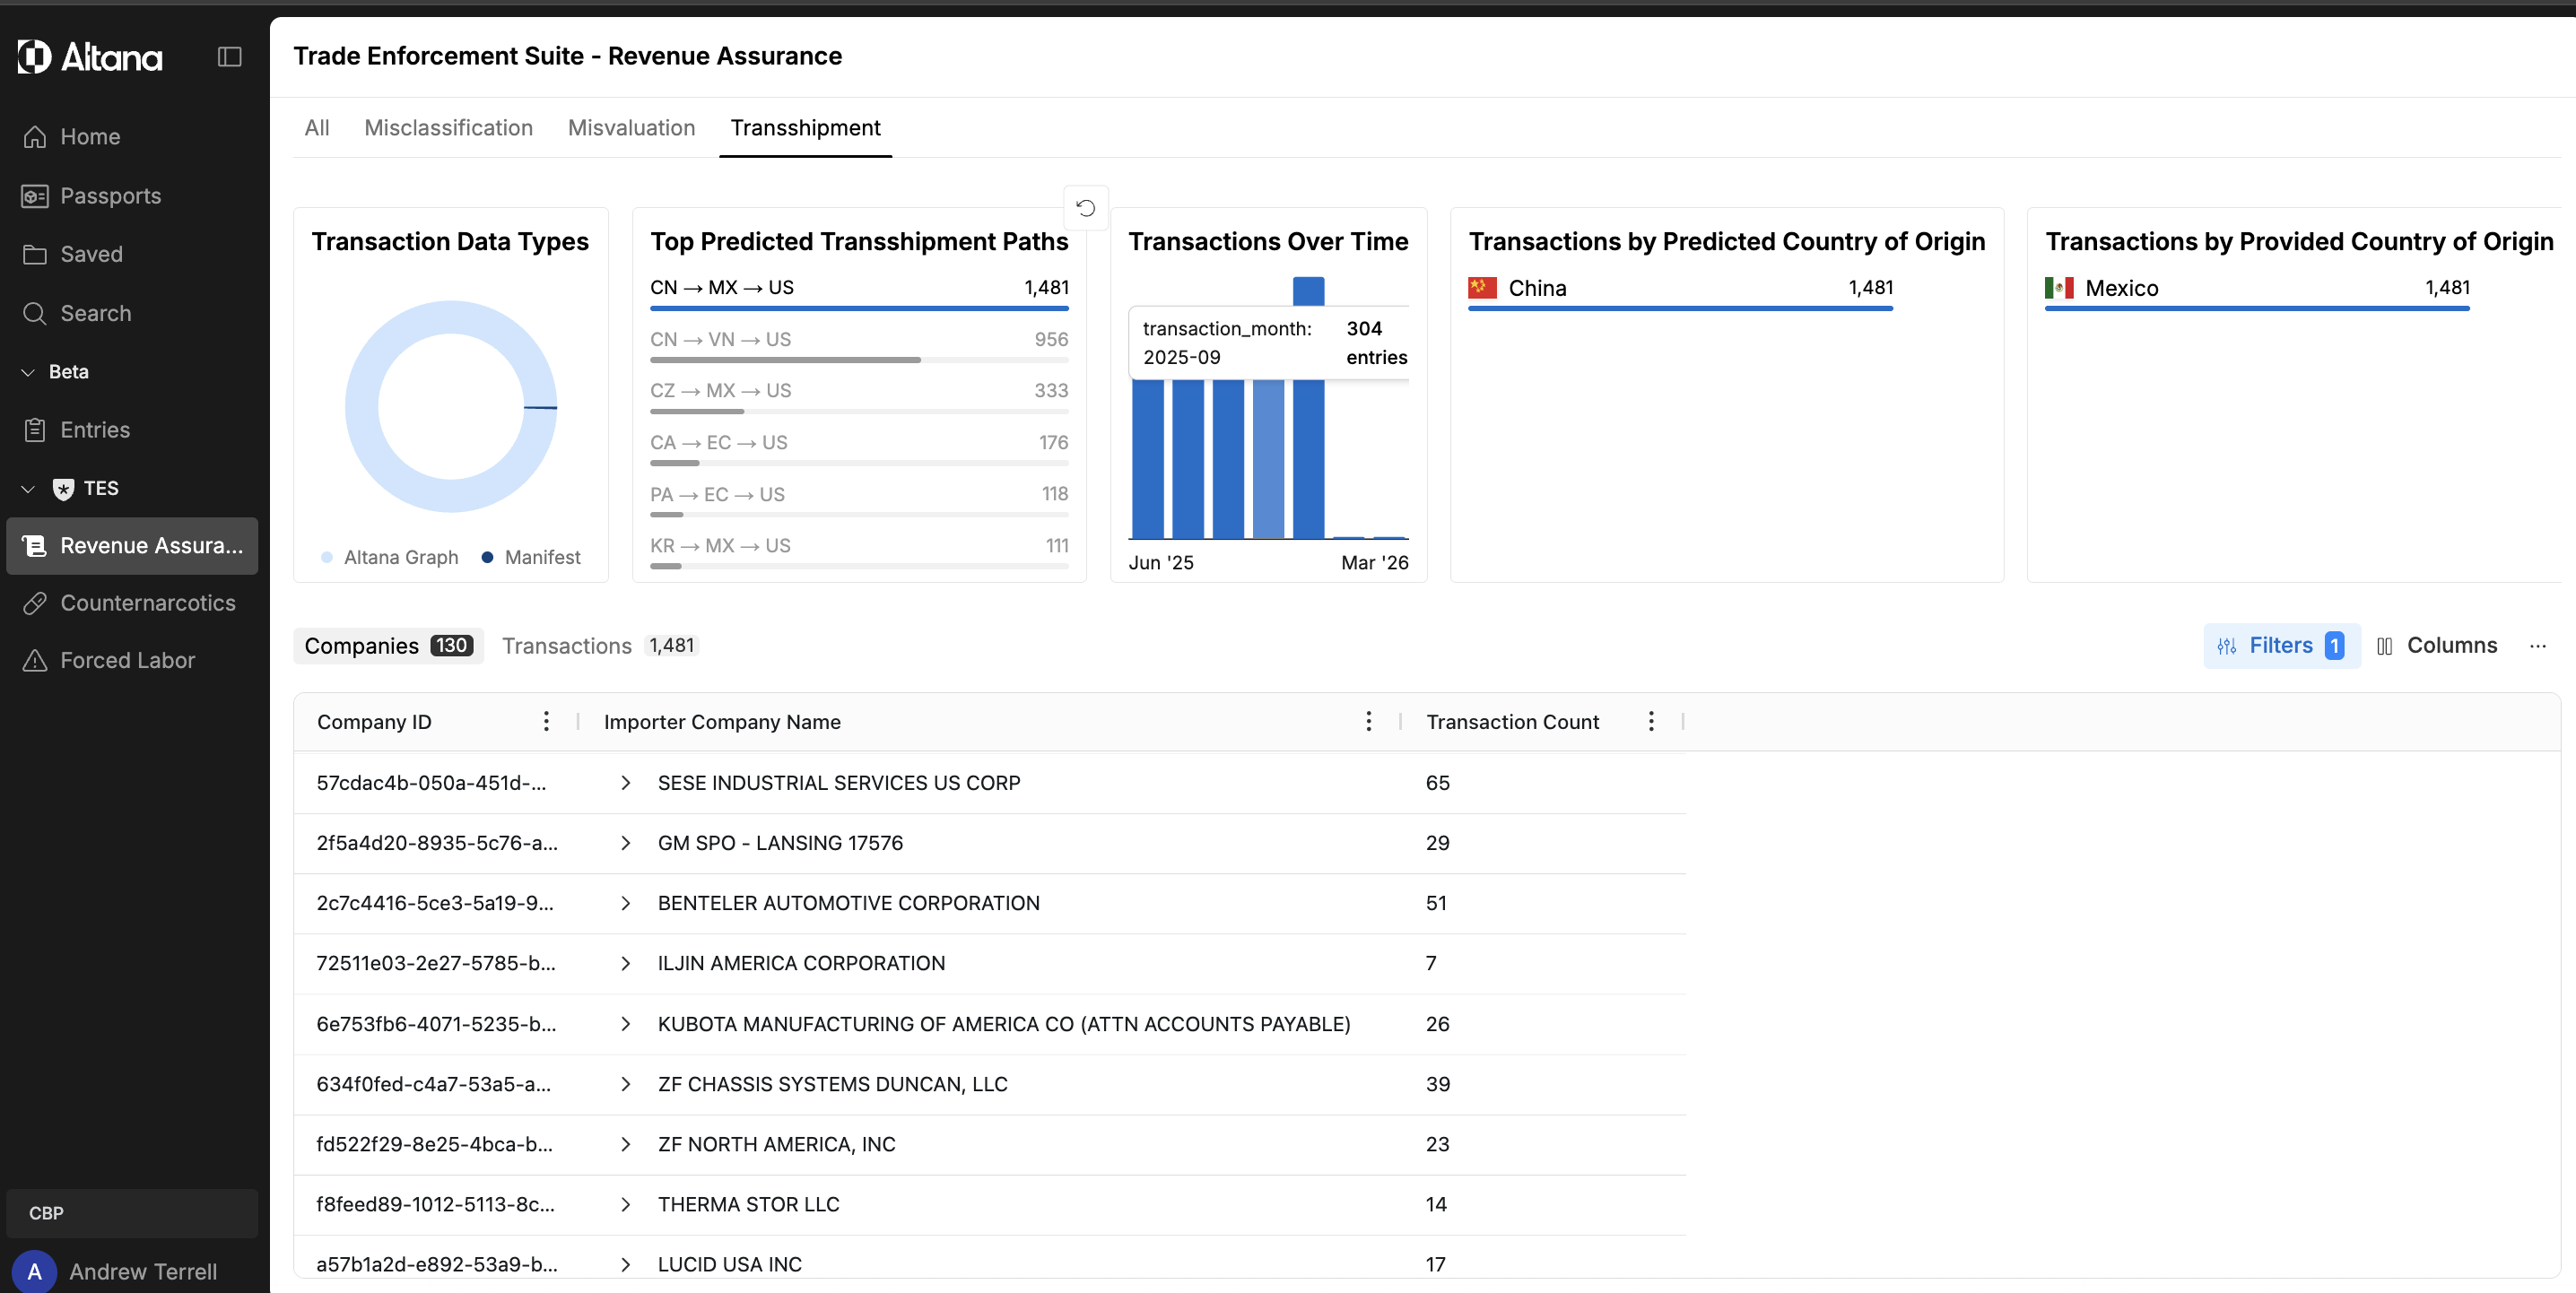
Use the tabs at the top of the workspace to select the risk lens you want to focus on — Misclassification, Misvaluation, or Transshipment. Selecting a tab filters the entire workspace to that vector, updating the summary charts and the companies and transactions table to show only the relevant flagged data.

Step 3: Apply a Filter Block
Use the Filter Block to narrow the result set. Filters let you constrain results by dimensions such as country of origin, transaction date range, or other available fields — reducing the working set to the segment most relevant to your targeting objective.
Step 4: Rank by a relevant column
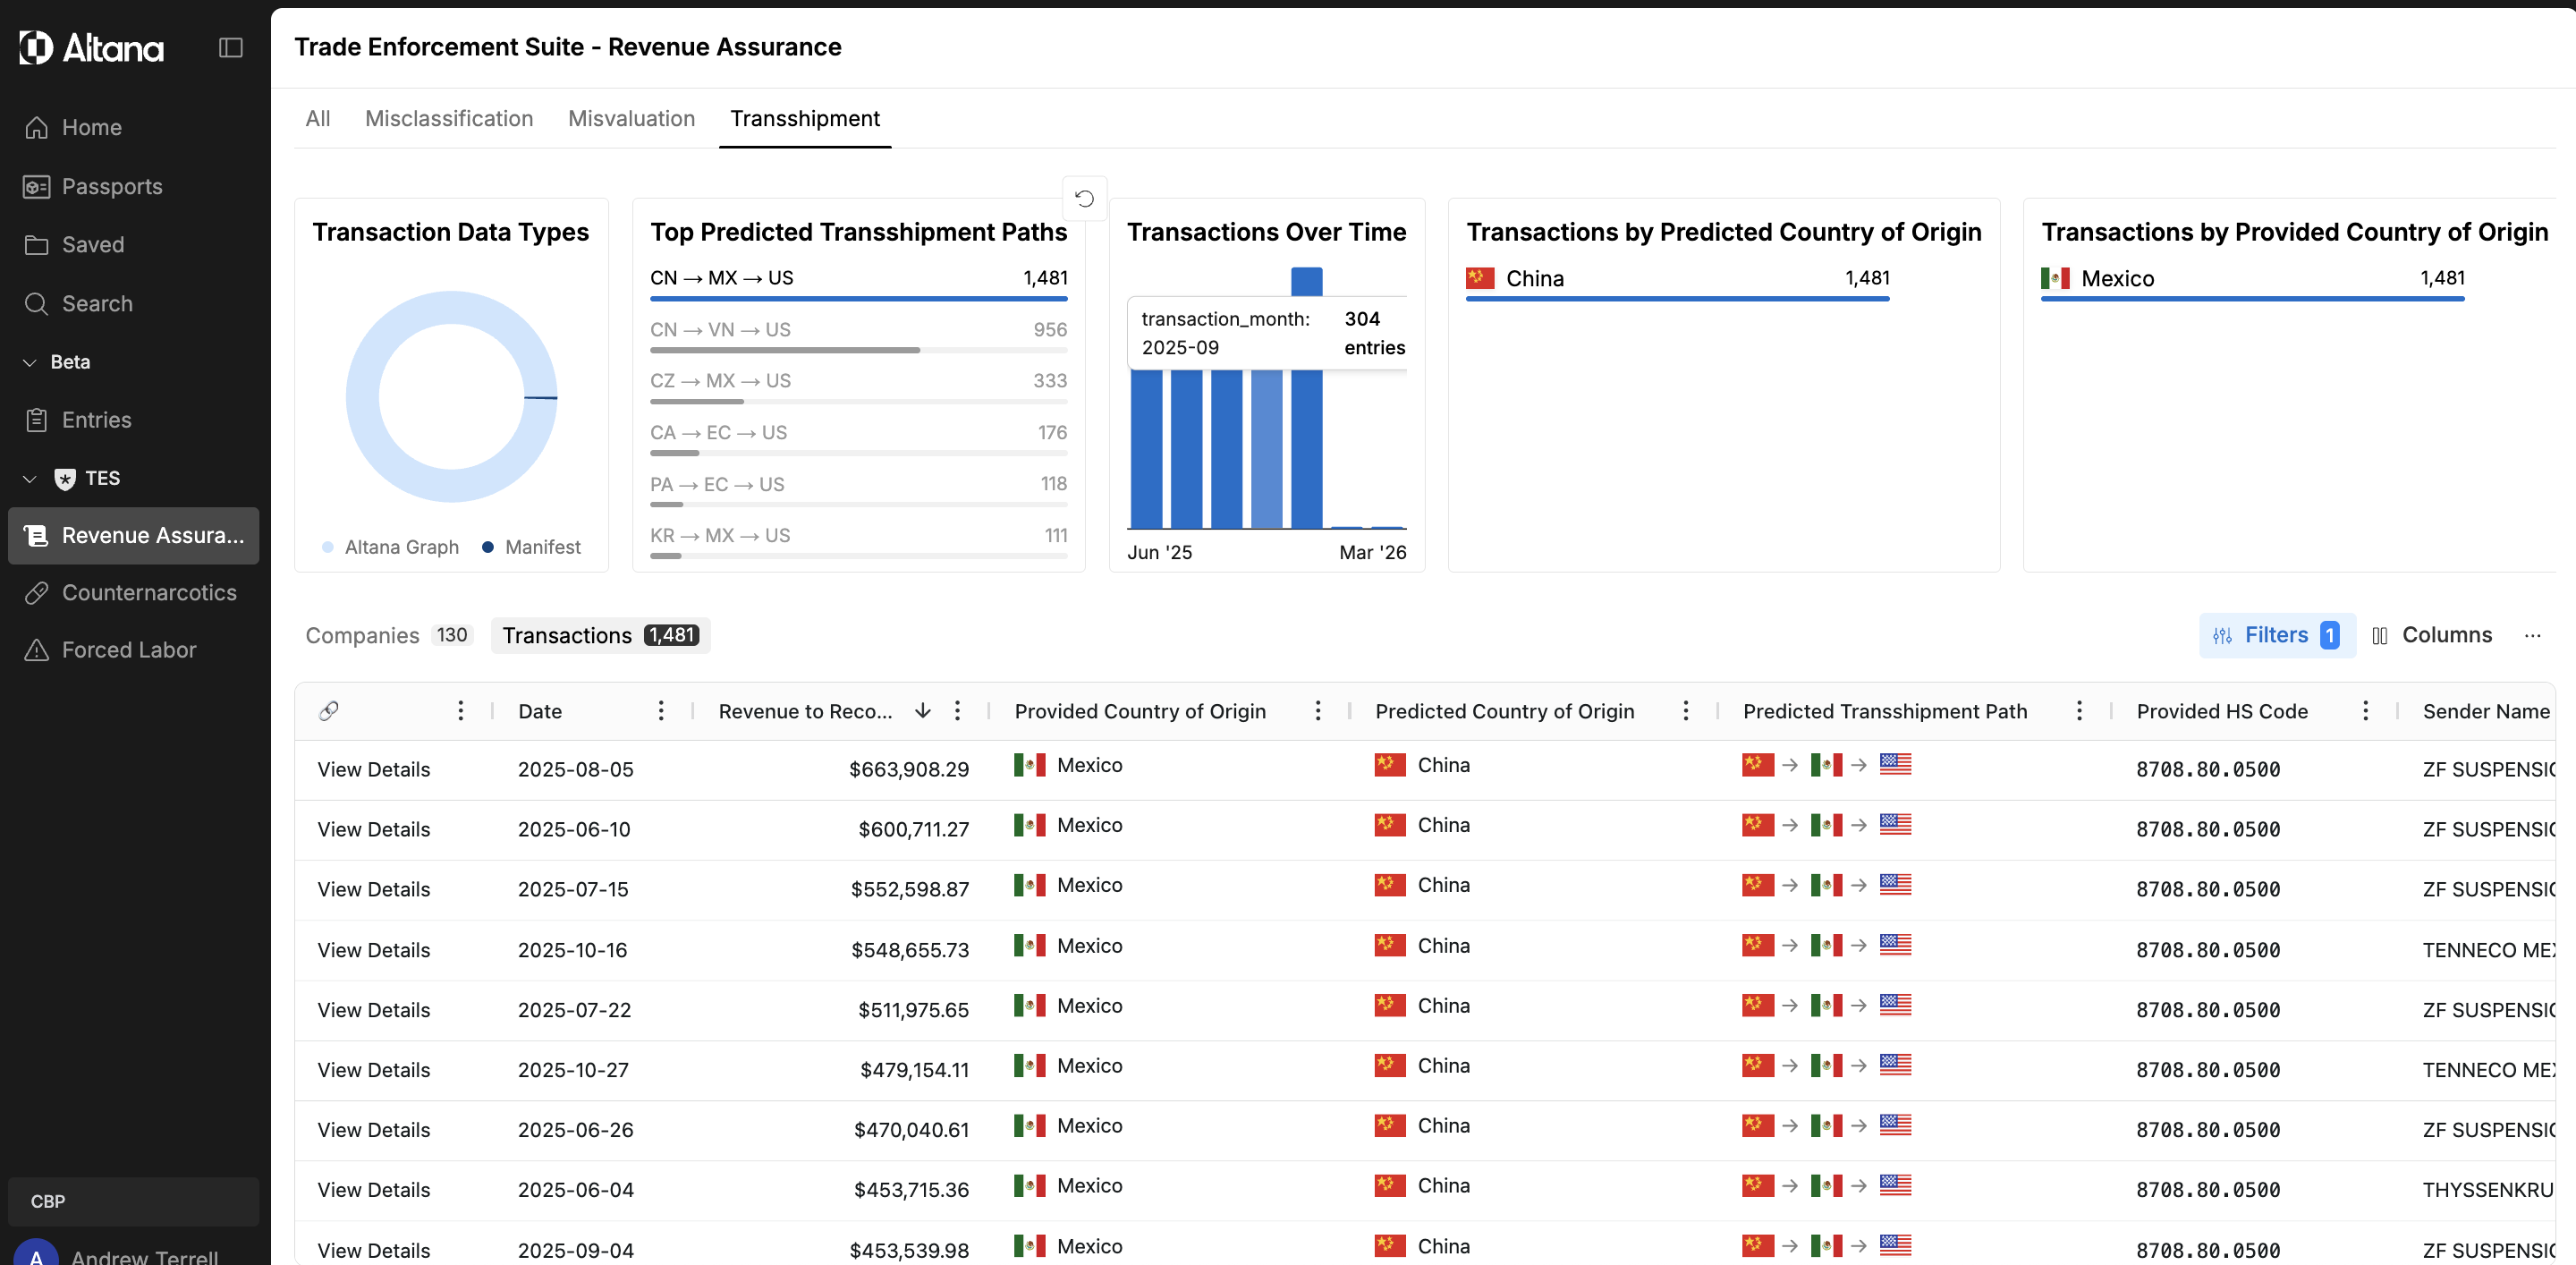
Switch to the Transactions view and sort by the column most relevant to your objective — for revenue recovery work, sort by Revenue to Recovery descending to bring the highest-impact transactions to the top. The ranked list gives you a prioritized queue: the transactions with the greatest potential impact, ready to act on.
Step 5: Generate a report or export the data
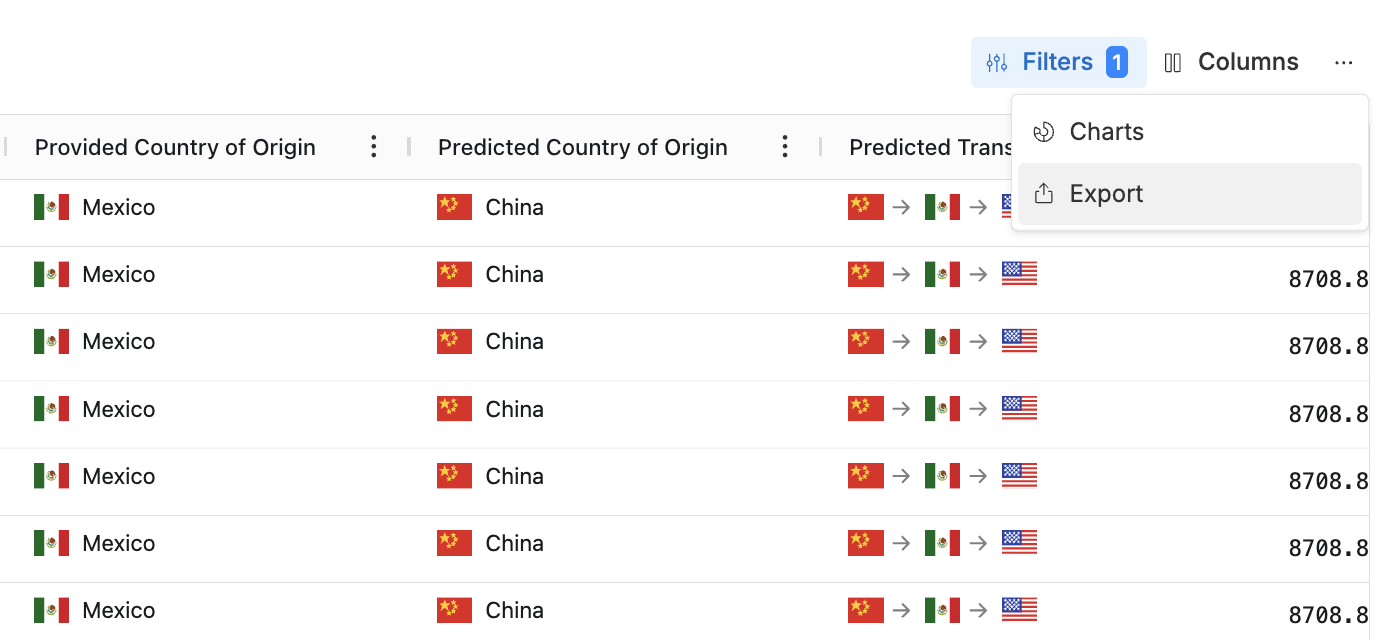
From the ranked transaction list, use the ⋯ menu (top right of the table) to take action on the results.
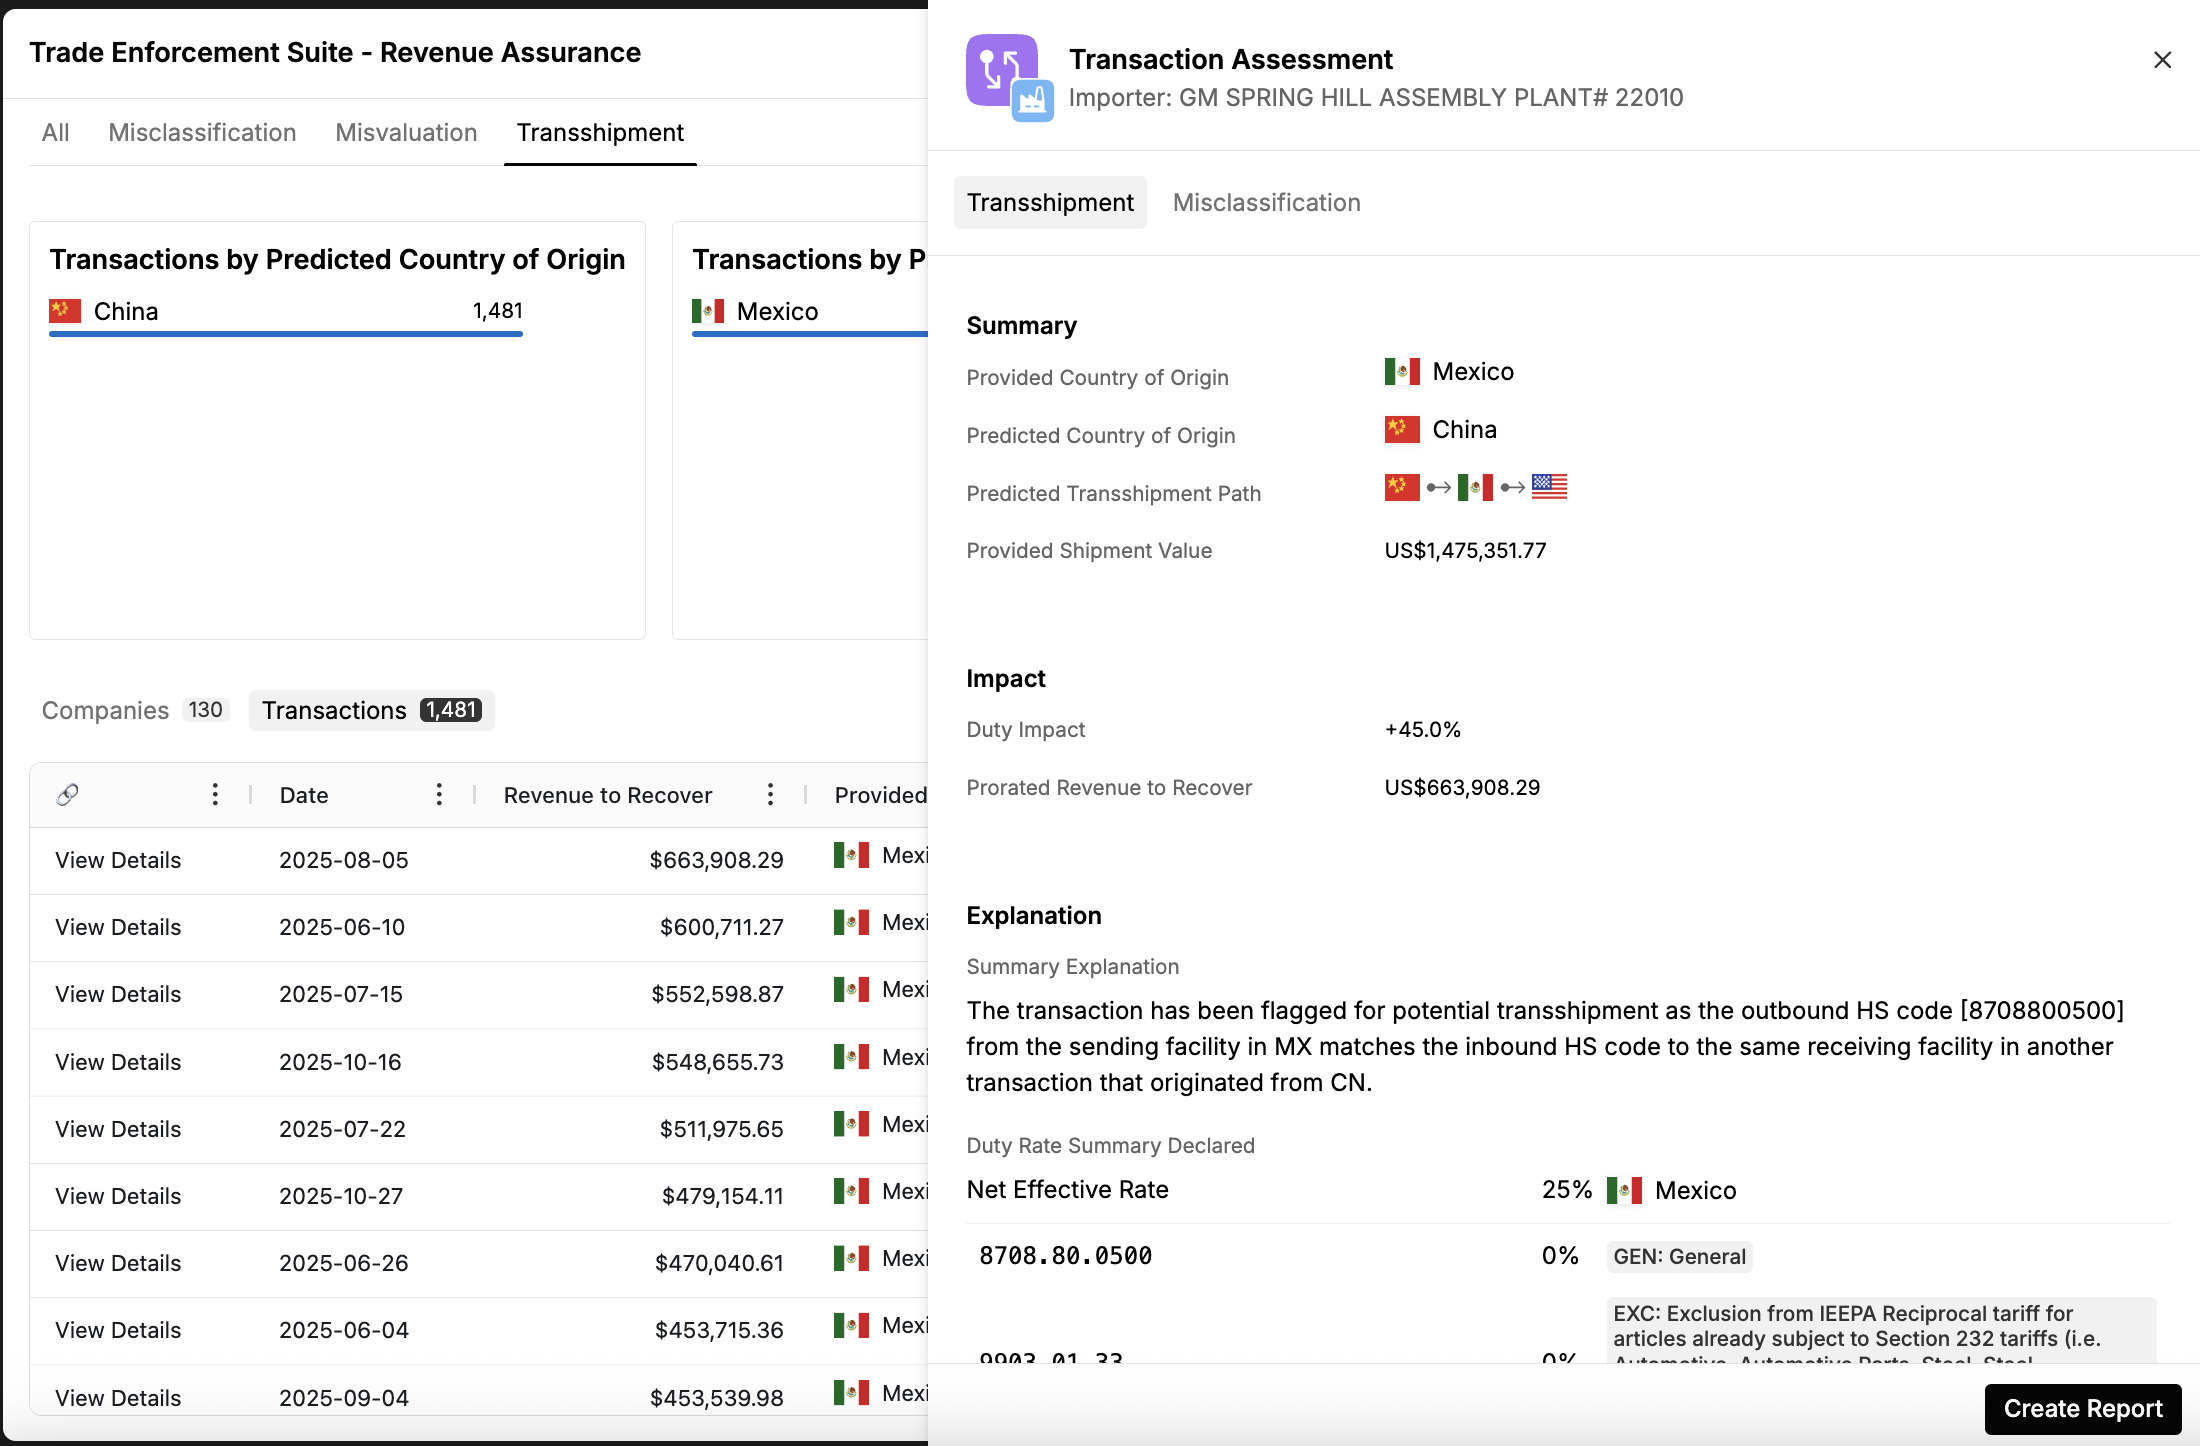
Generate a report — select a transaction row to open a transaction assessment, then click Create Report. The report assembles the evidence behind the flag into a structured document, including shipment details, predicted origin, transshipment path, duty impact, and the AI's explanation — ready to share or attach to a case.
Export the data — select Export from the table menu to download the current filtered and ranked result set for use in downstream analysis or case management systems.