Classification Statuses
Classification Statuses
Streamline your workflow while building an audit trail
Our Classification Statuses guide your workflow end-to-end, making it easy to track which classifications require your team’s input, which classifications are ready for review, and which classifications have been approved by your customers. All the while, Altana tracks how each classification was determined – giving you a defensible record of all your work.
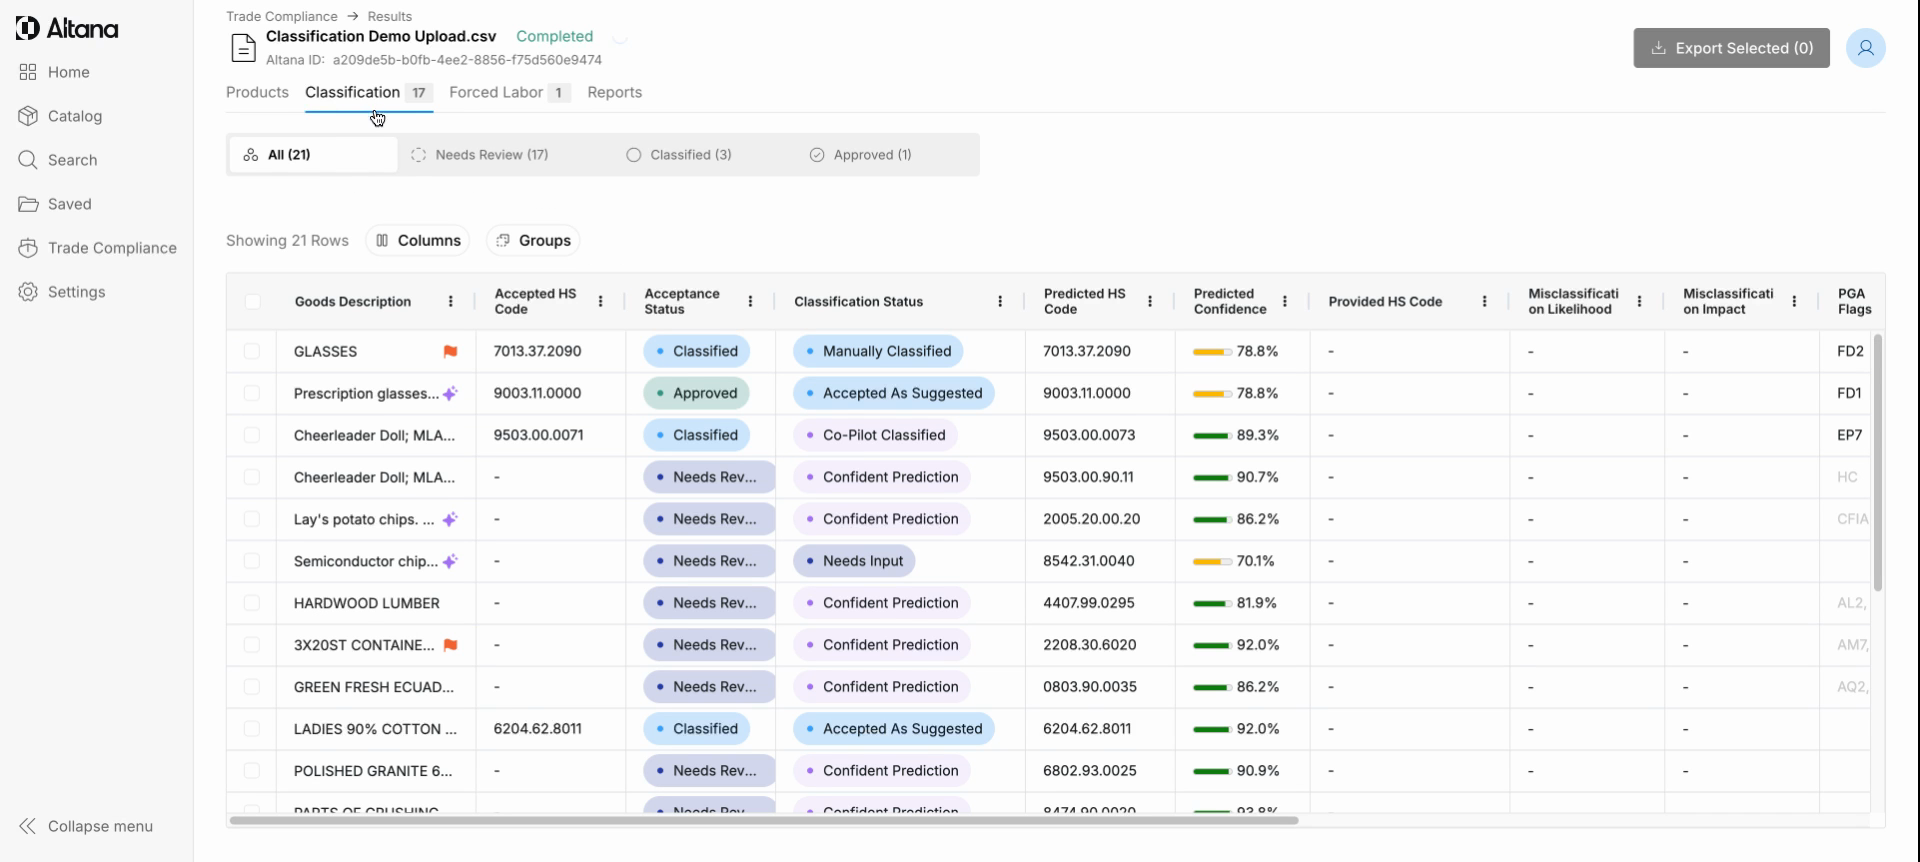
Step 1: After you've uploaded the CSV file of your next classification project, navigate to the Classification tab. Here, you'll find an overview of all of your uploaded products along with their Acceptance Status. A classification's Acceptance Status can be set to Needs Review, Classified, or Approved. We'll cover the importance of each status in this guide.
Altana Partner Tip: The more product data you can provide in your CSV upload, the stronger your predicted HS scores will be. Learn more here.
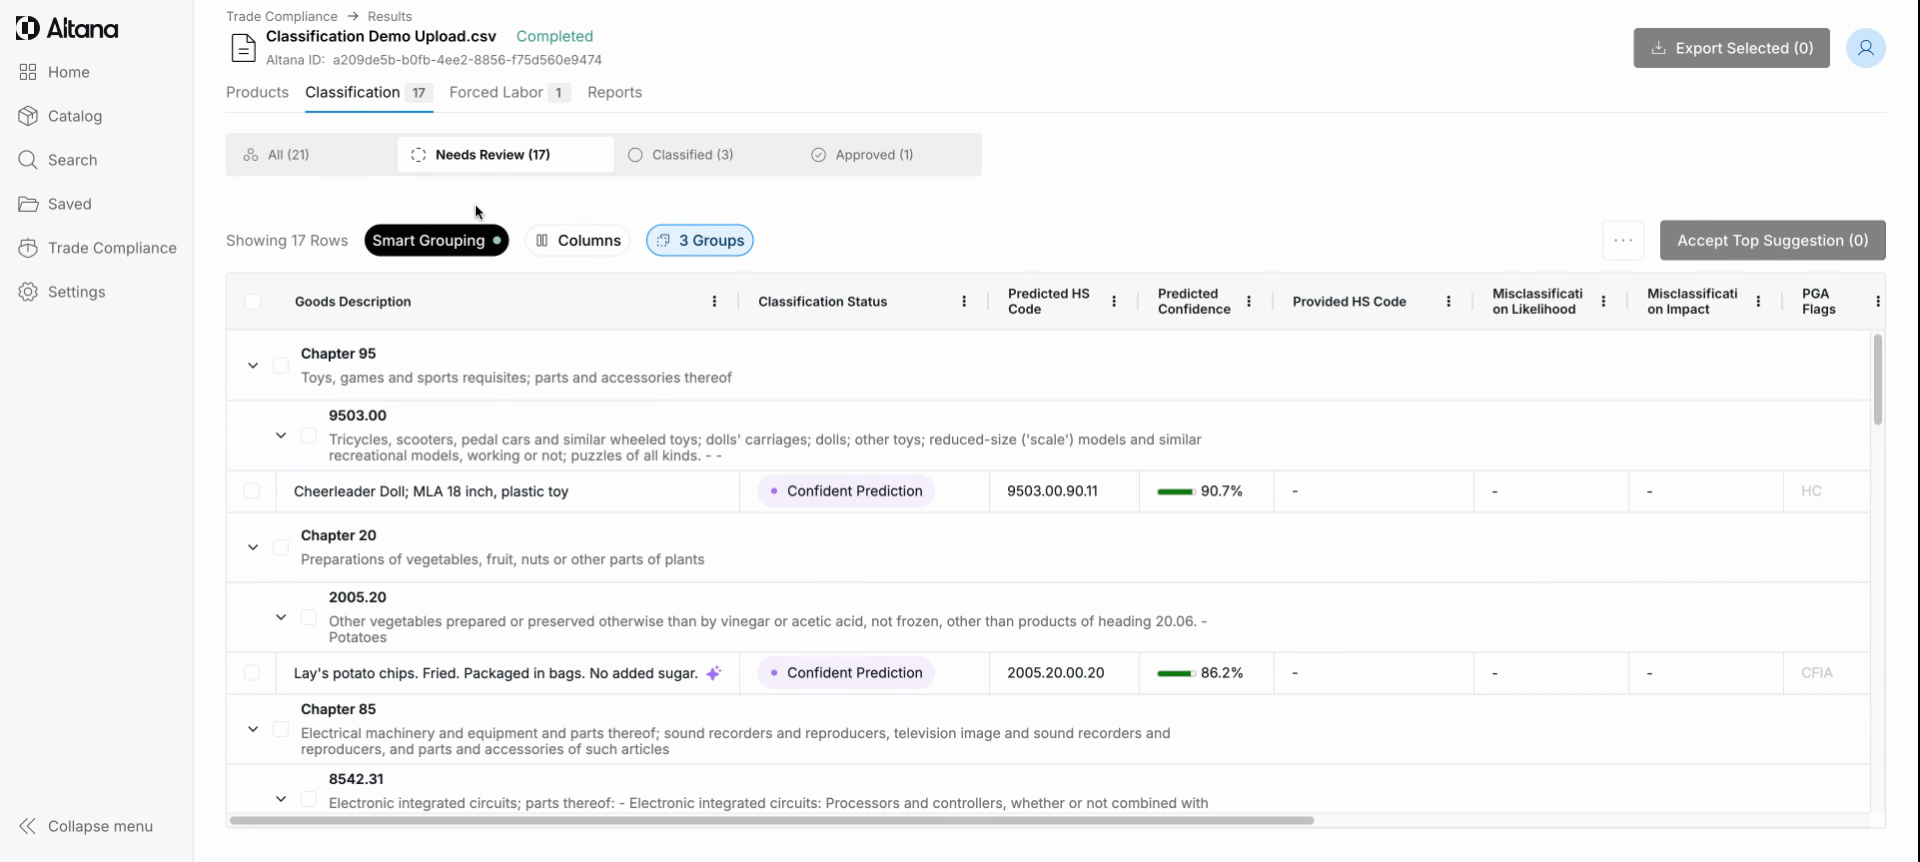
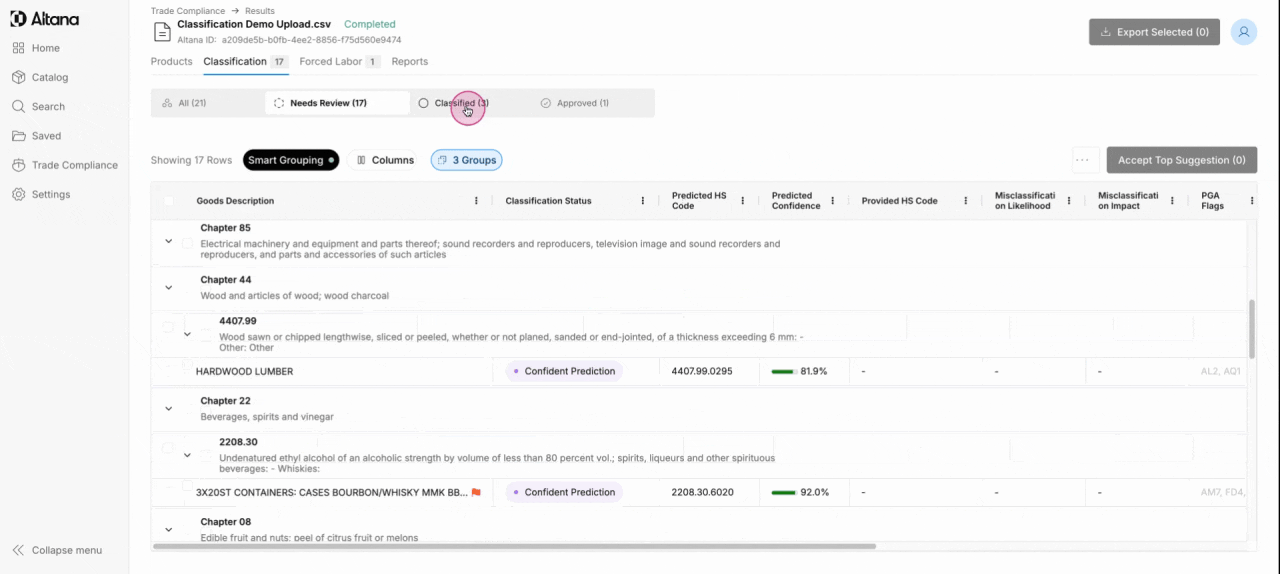
Step 2: Begin your classification work by clicking on the Needs Review tab.
Here you will find recommendations for each classification. They will each be marked with an accompanying Classification Status, which will be set to one of the following:
Confident Suggestion: Altana's models were able to select a top HS code prediction with high confidence. You're welcome to review these predictions as desired.
Needs Input: Due to lack of information, Altana's models were not able to select a top HS code prediction with high confidence. Your review is needed to select the correct classification.
Likely Misclassified: Altana's models predict, with high confidence, that a different HS code is a better match than the one uploaded by a user into our platform. Review our prediction and select the correct classification.
While Altana provides suggestions, we believe that brokers must make decisions. Each suggestion must be accepted by you in order to proceed to the next step — the Classified tab.
Altana Partner Tip: Our Smart Grouping feature automatically sorts similar products by predicted HS chapter, subheading, and HS10. See how Smart Grouping gives you the ability to efficiently bulk process your classifications. Learn more here.
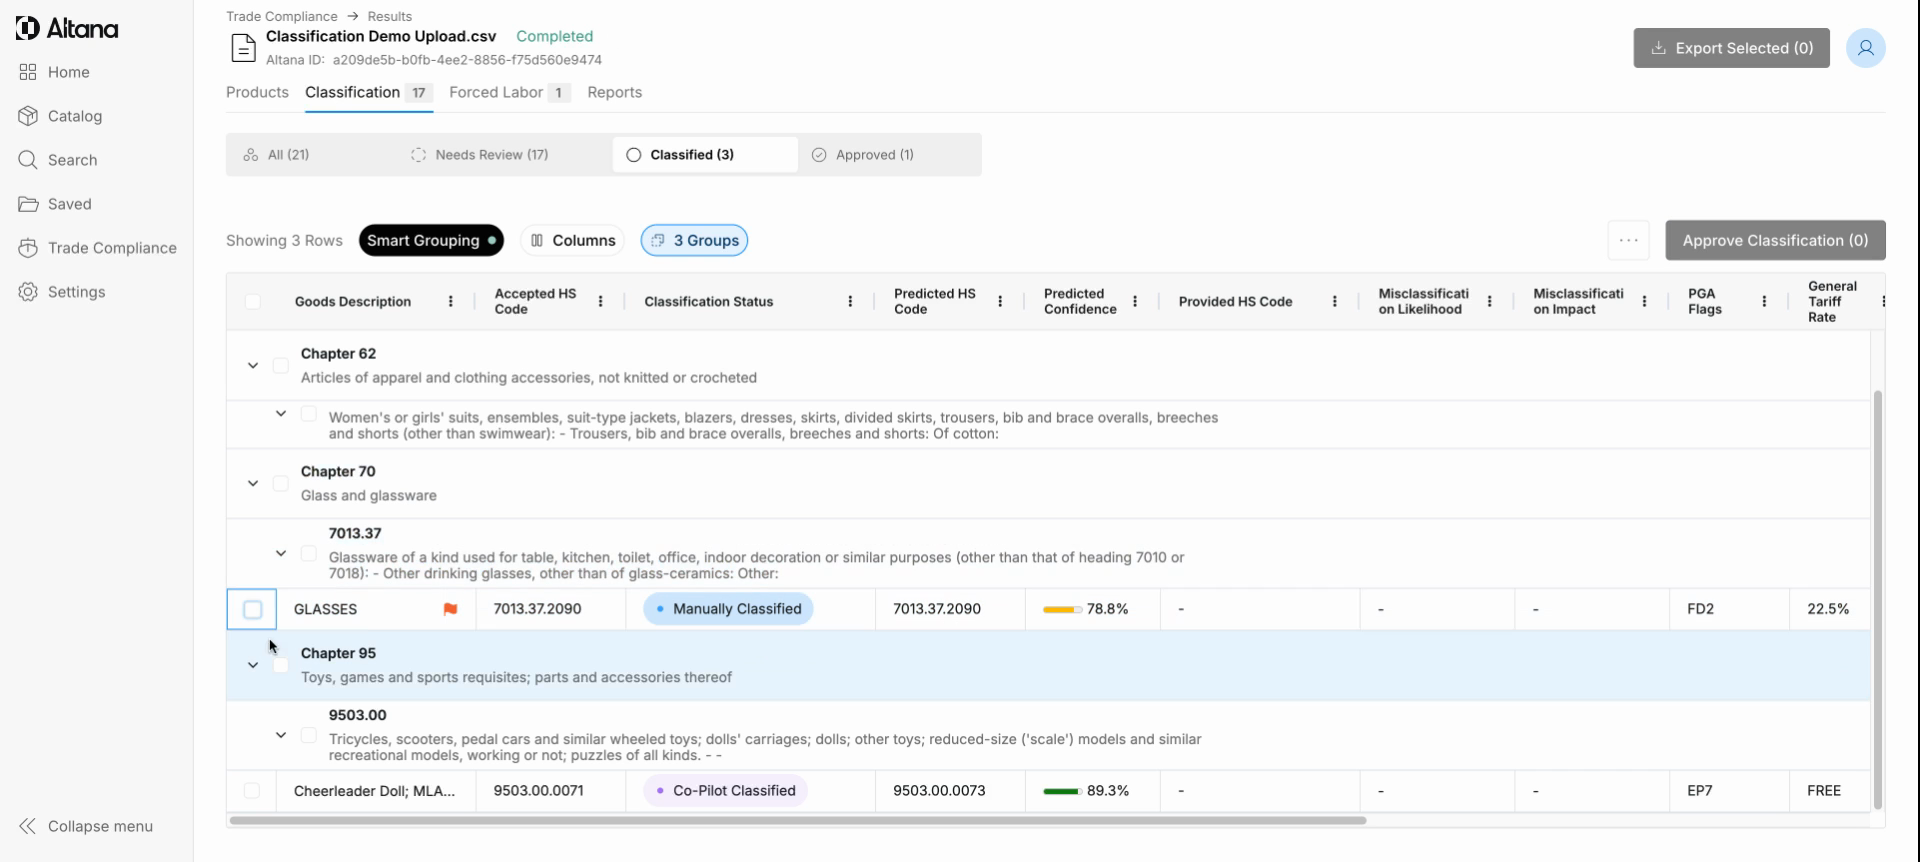
Step 3: In the Classified tab, you'll find that the Classification Status updates to provide a clear guide to how you reached each classification. They will be set to one of the following:
Accepted as Suggested: You approved Altana's confident suggestion for a classification.
Accepted as Provided: The HS code you uploaded matches the prediction from Altana's models.
Co-Pilot Classified: You utilized Altana's Co-Pilot to assign a classification.
Manually Classified: You manually assigned a classification.
Manually Accepted: You accepted one of the five classification predictions provided by Altana.
On any tab of the transaction screening tool, on the Goods Description column, Provided HS Column, and Predicted HS columns, you can use the Column Filter button to add up to 10 AND/OR filter options. You can reset the filters directly from the drop down using the "Reset" button.
Step 4: Your manager or external stakeholders can provide final confirmation of your work by clicking Approve Classification. Once a classification has been moved to the Approved tab it has reached the end of your workflow — it has been assigned a classification and all actions taken along the way have been saved to your Audit Log for defensibility purposes.
Connect with your Technical Account Manager to get your stakeholders setup with access.
Our Classification Statuses streamline your workflow from start to finish, allowing you to easily monitor which classifications need your team's attention, which are awaiting review, and which have received customer approval. Meanwhile, Altana meticulously records the basis for each classification, providing you with a reliable account of your efforts. Experience the efficiency of our workflow today and classify faster and more accurately than ever before.