Altana Forced Labor Transaction Screening: Overview and Reviewing Insights
Understanding Forced Labor Exposures in Your Supply Chain
Pinpoint risk exposure and precisely locate where forced labor enters your client's value chain
This tutorial will help the user understand the various insights provided by Altana's transaction screening tool and develop a deep understanding of the key features.
Step 1: Be sure to review Steps 2 & 3 in Getting Started with Altana's Trade Compliance Tools guide to ensure the required fields are included in your CSV and correct features are toggled on prior to file upload. Altana's general guidance is provided below:-
Required
HTS10
Goods Description
Shipment Date
Country of Import
Country of Export
Sender Name
Sender Address
Receiver Name
Receiver Address
Transaction ID
Ancillary
Manufacturer Name
Manufacturer Address
Step 2: After your file has fully processed with the Forced Labor toggle enabled, select the file and click Explore Selection.
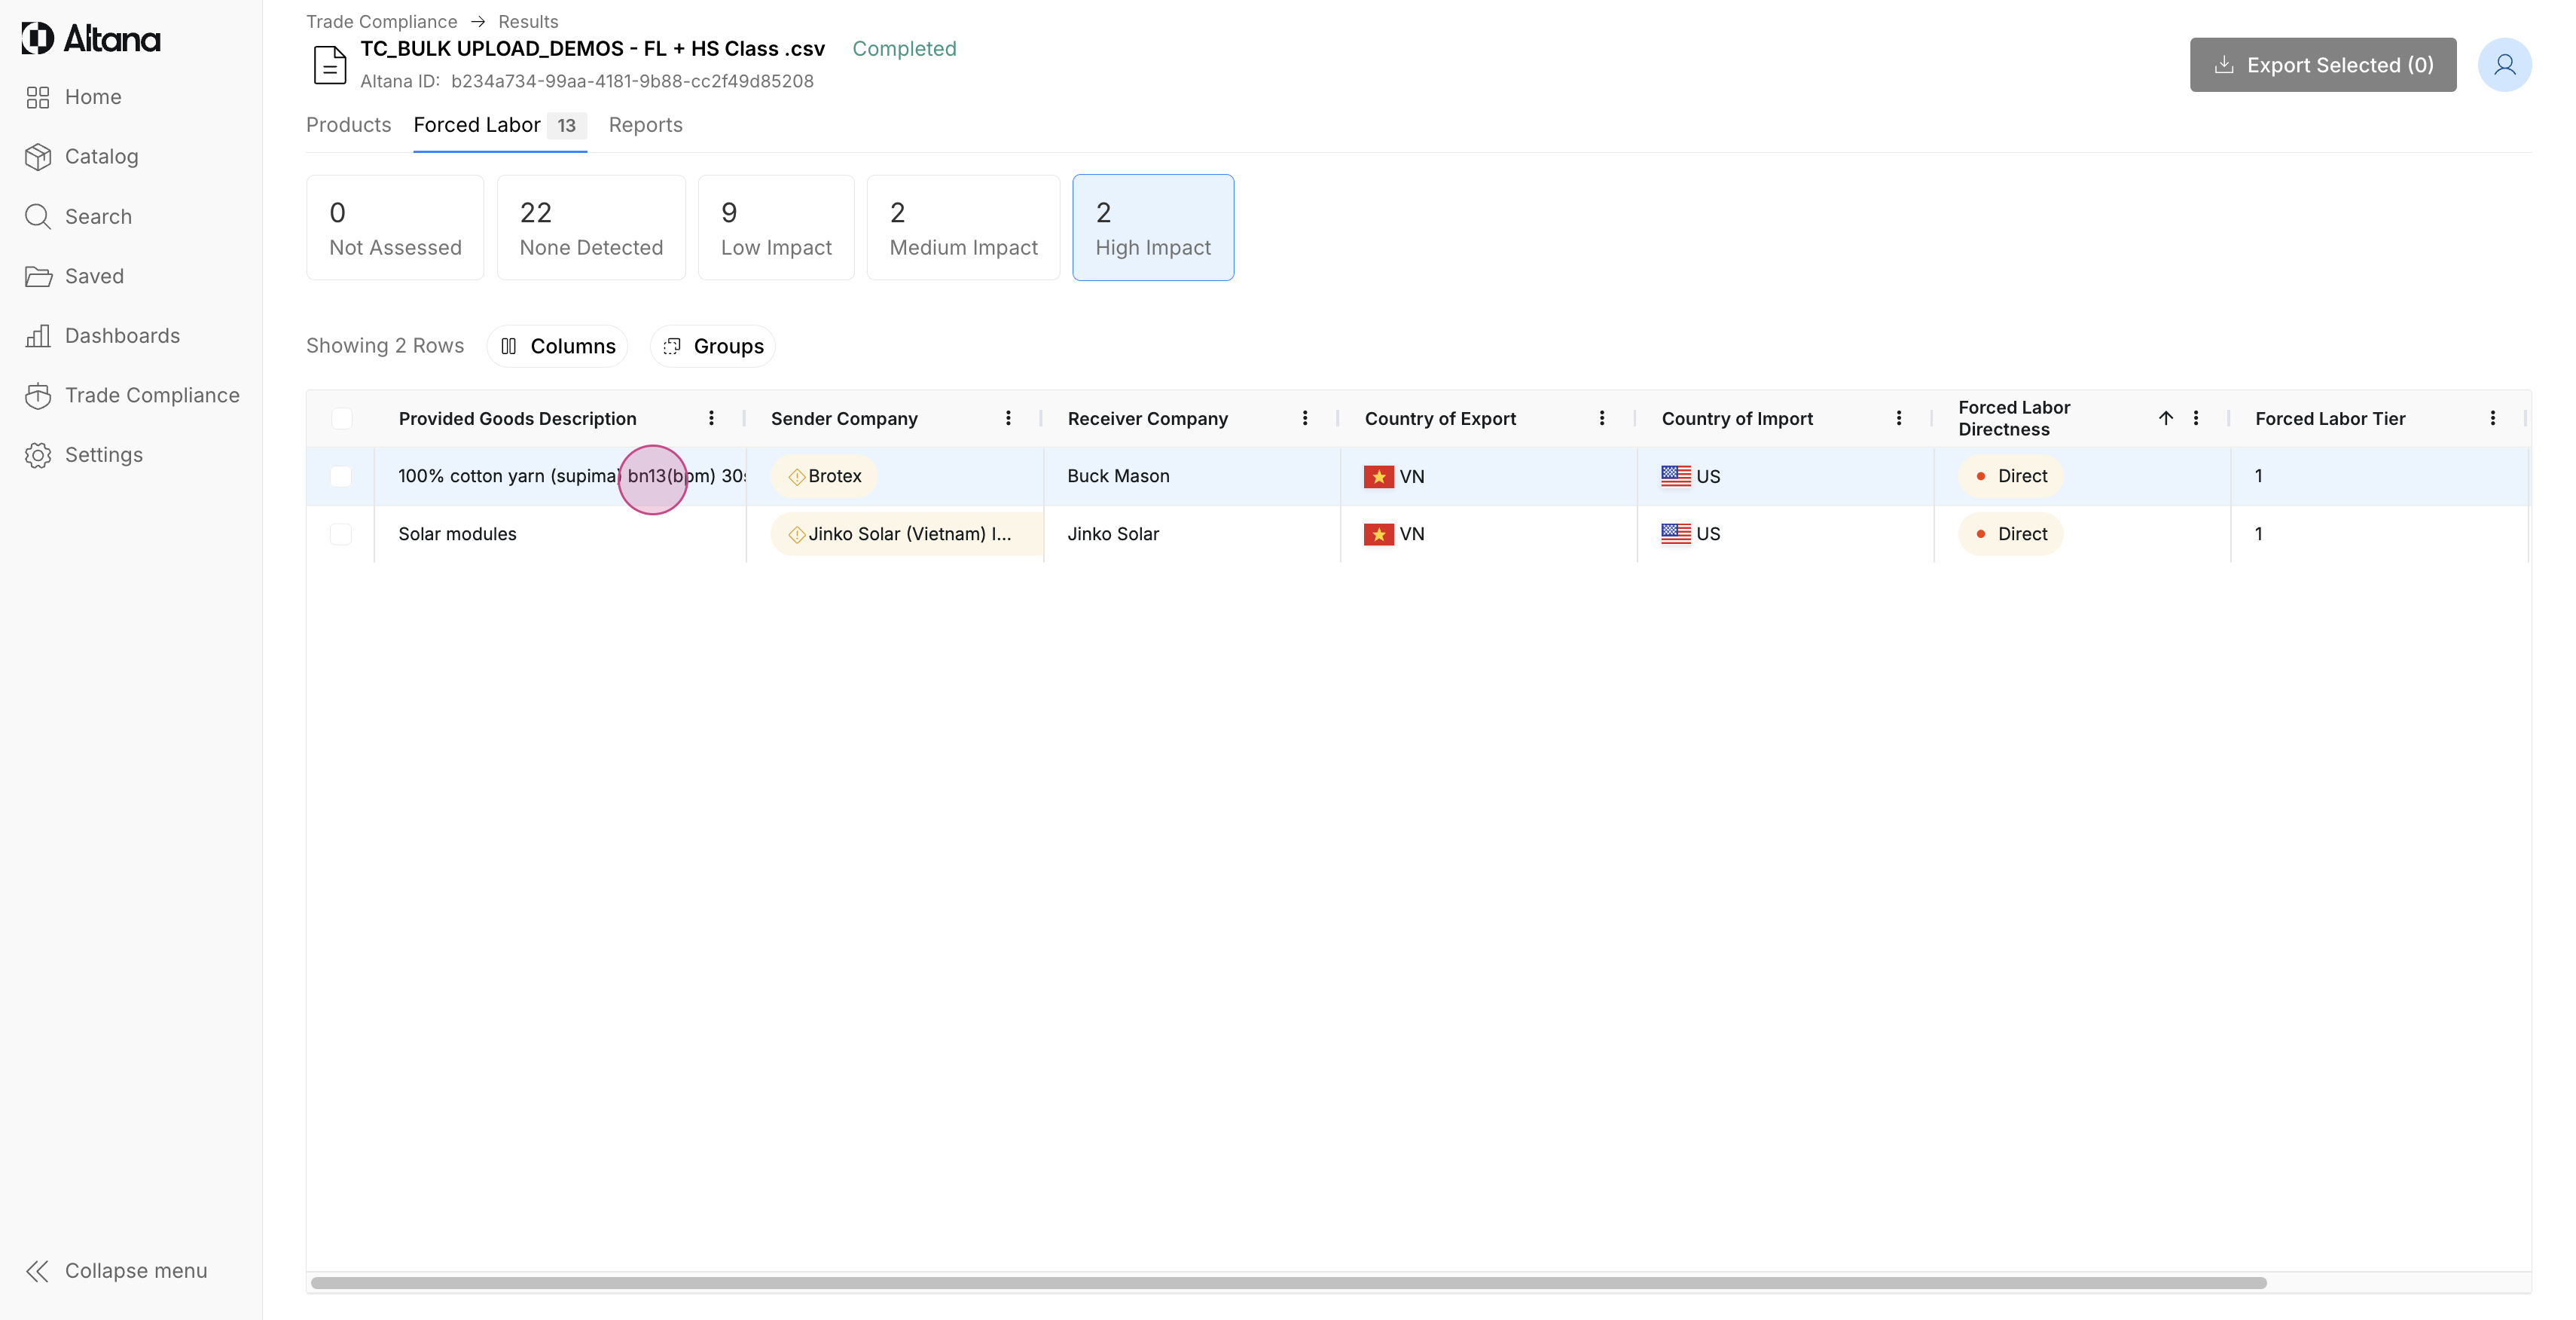
Step 3: Click on the Forced Labor tab to review the insights of the screened products.
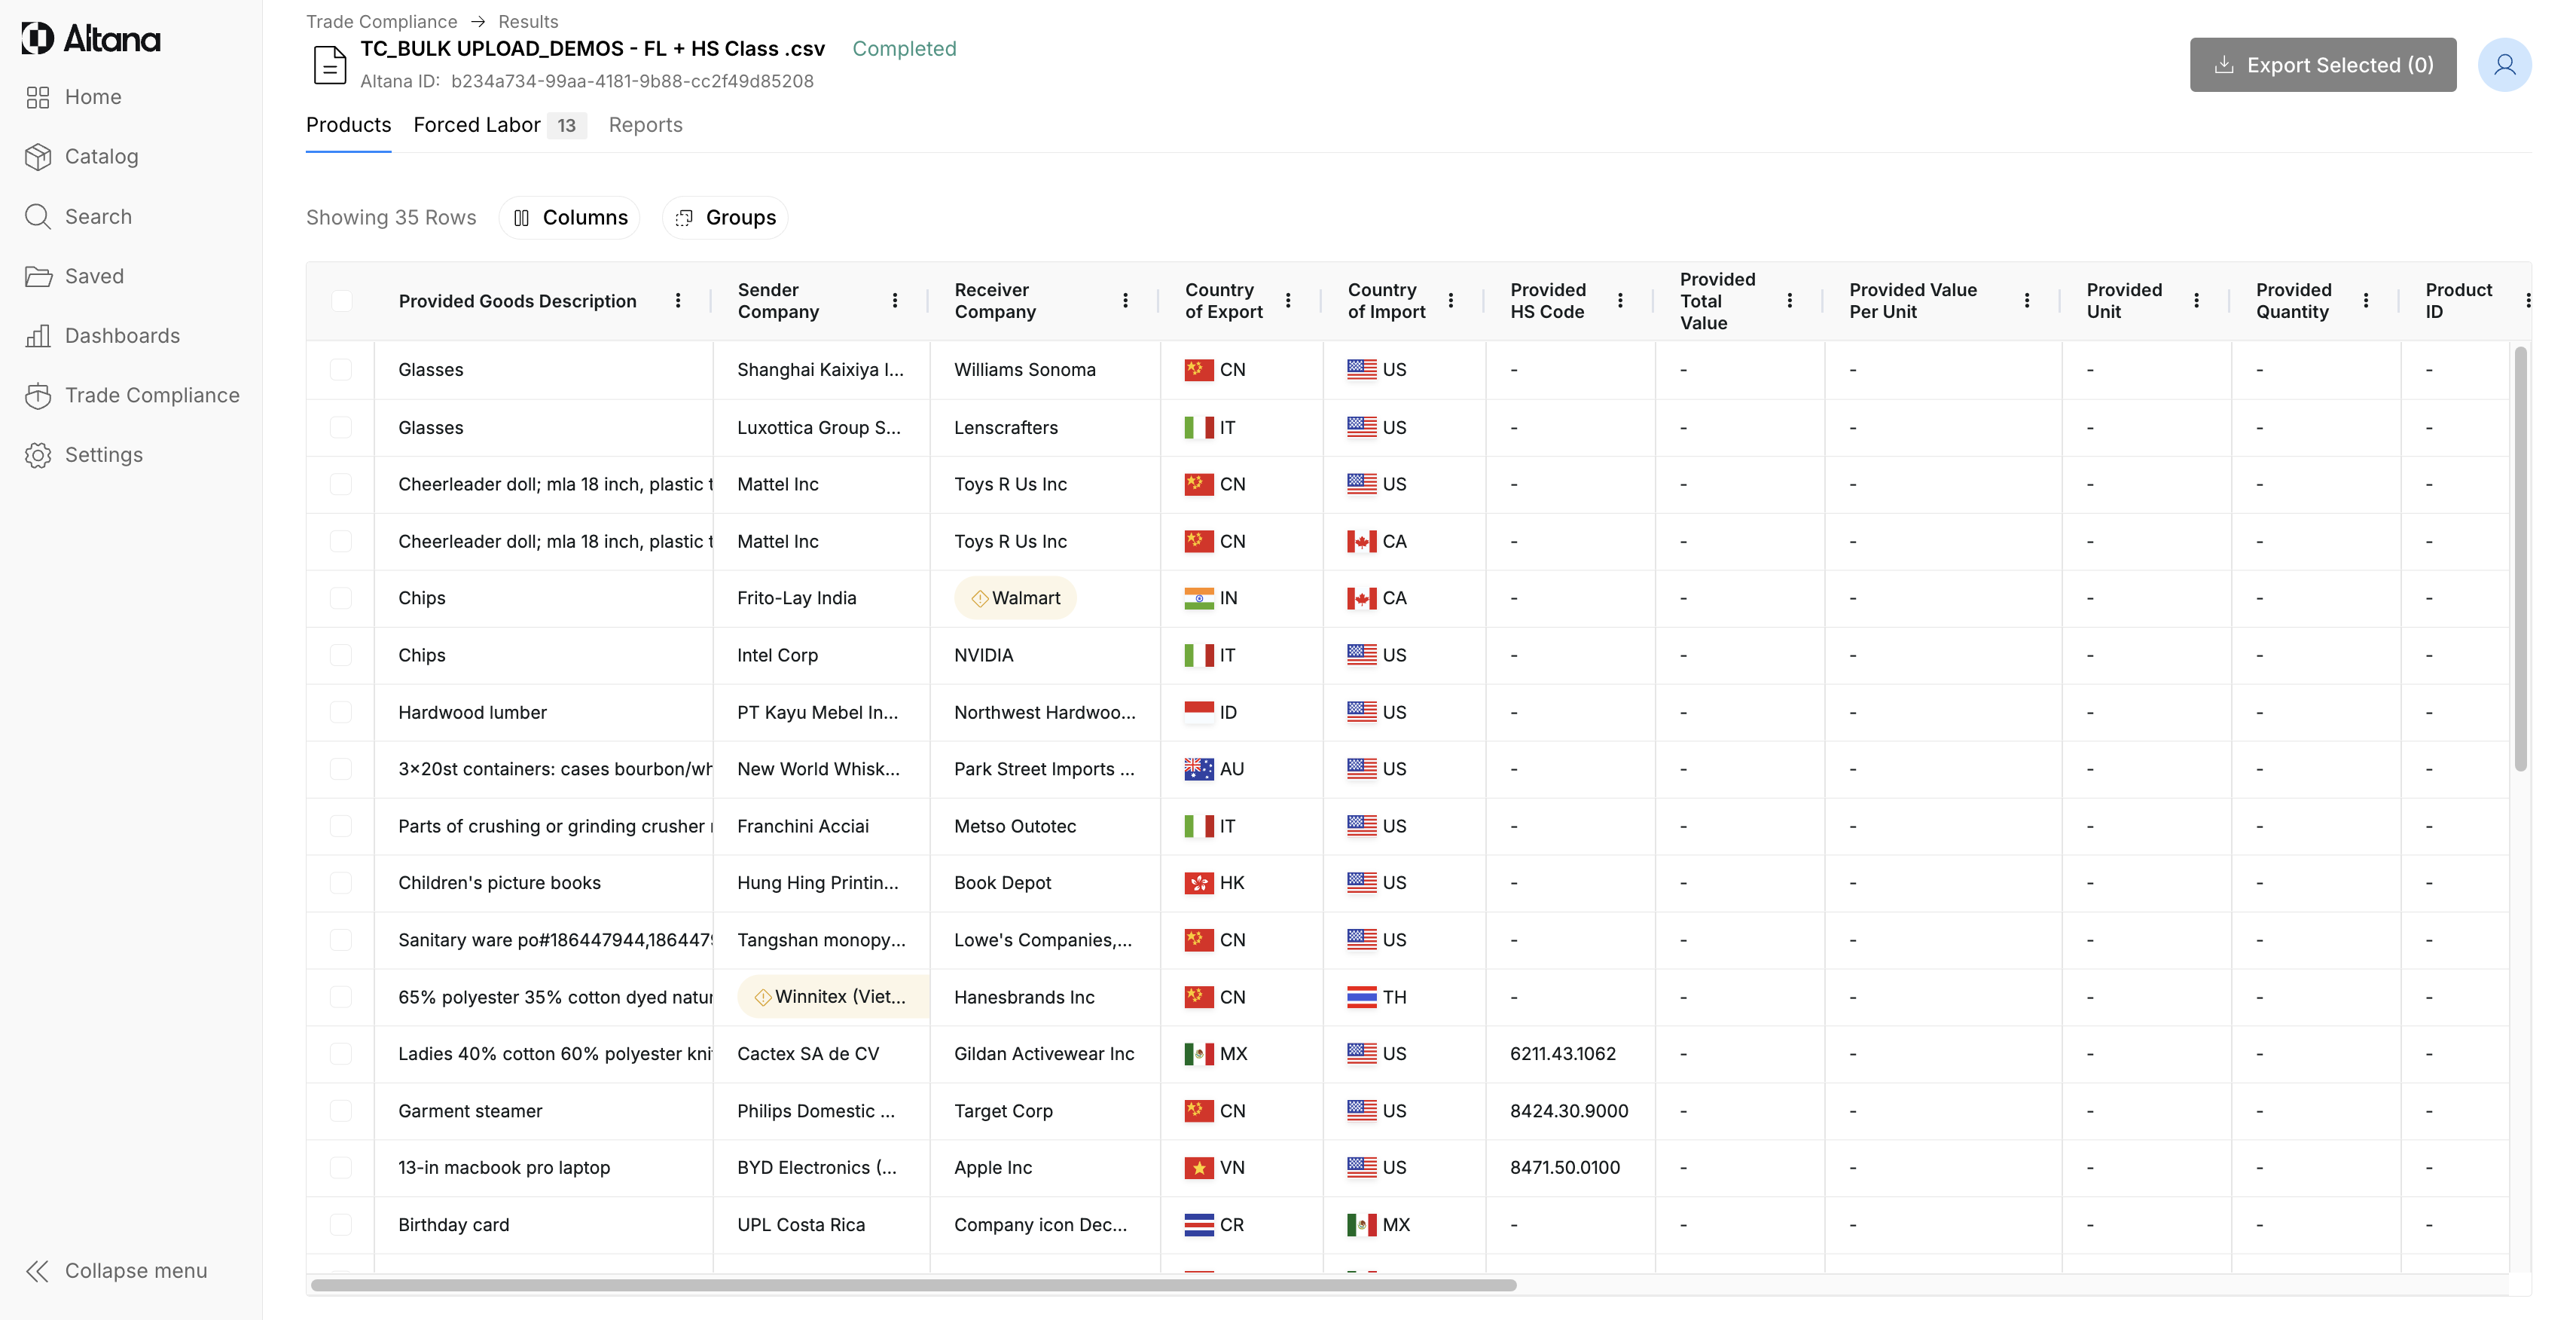
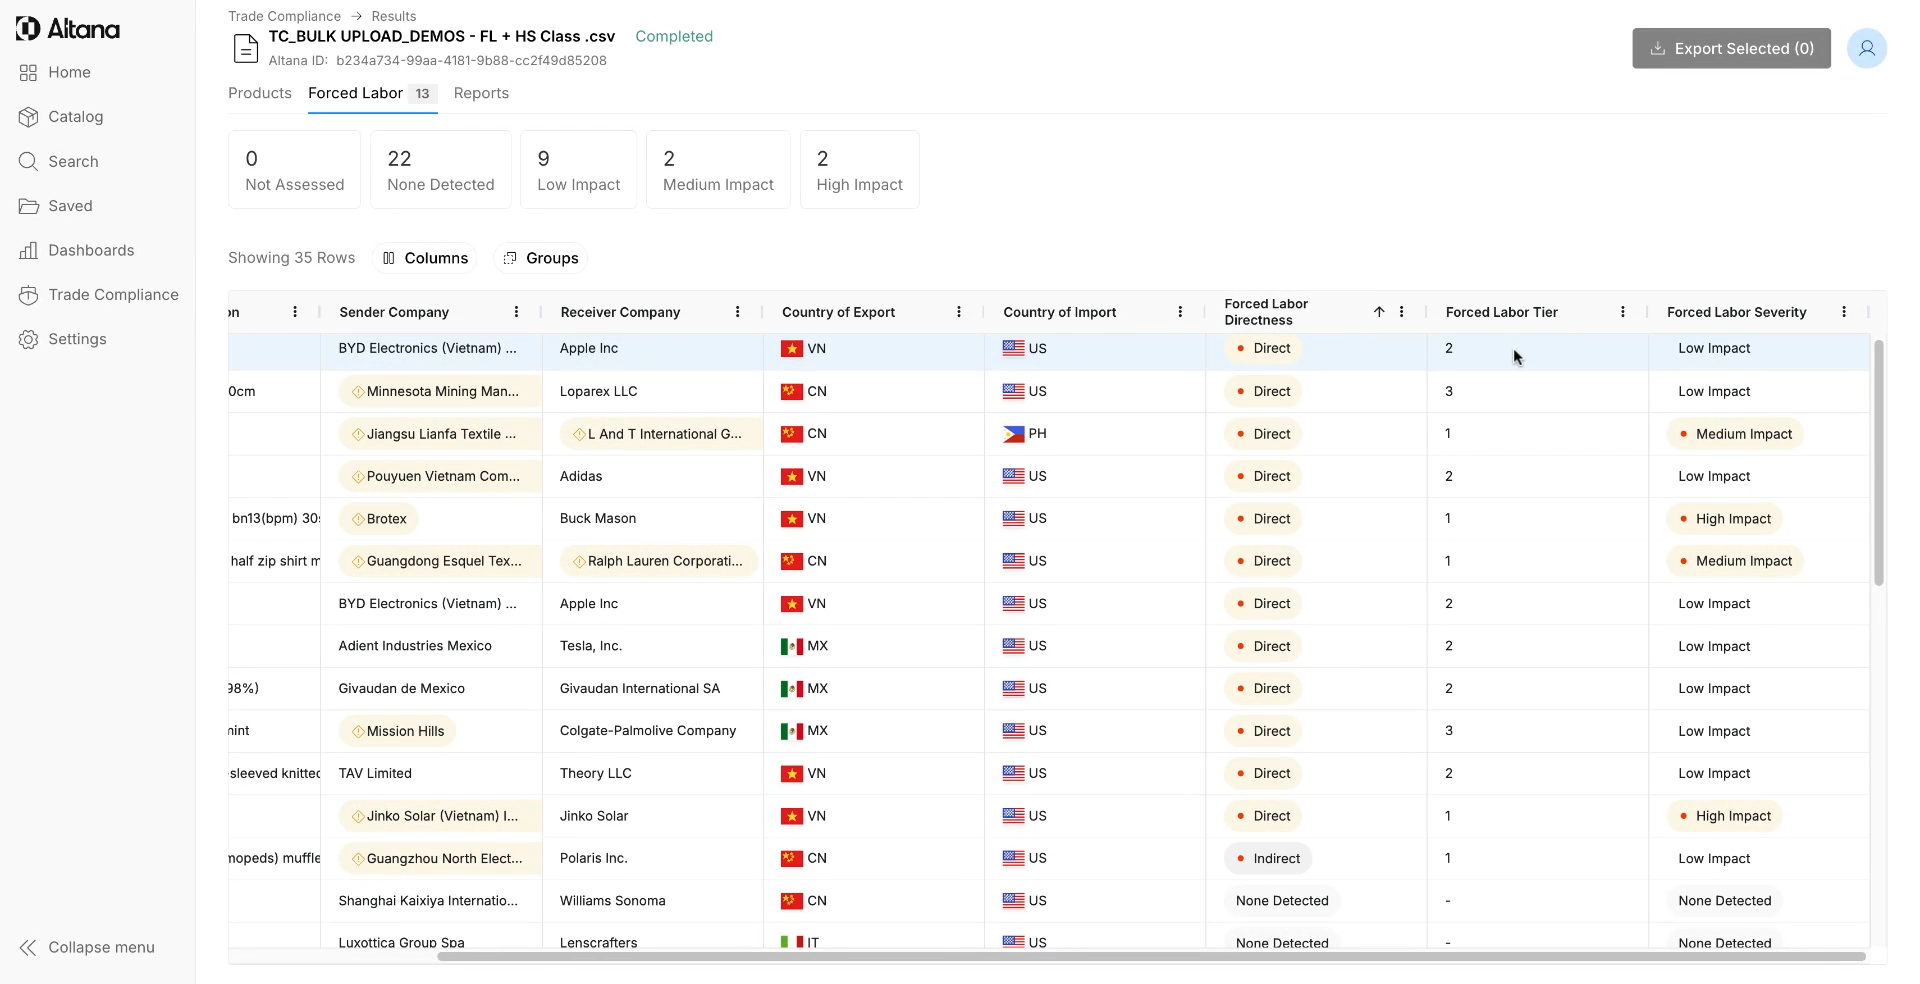
Step 4: Users can structure their workflows and prioritize according to the forced labor risk exposure summary at the top of the page. Clicking any of these will group the products by High, Medium, or Low Impact exposure, those which had None Detected, as well as those products that were Not Assessed. Note: products without a provided HS Code or Sender Company name are unable to be screened and therefore will be categorized as Not Assessed.
Step 5: Within the table, additional insights will be populated for each product, which include:
Forced Labor Directness: Defines whether there exists direct or indirect exposure(s) to the final good
Forced Labor Tier: Identifies the closest proximity in the product's value chain that a risk exposure exists
Forced Labor Severity: Altana generated score to assess and inform the severity of the detected forced labor exposure, reflected as High, Medium, or Low Impact
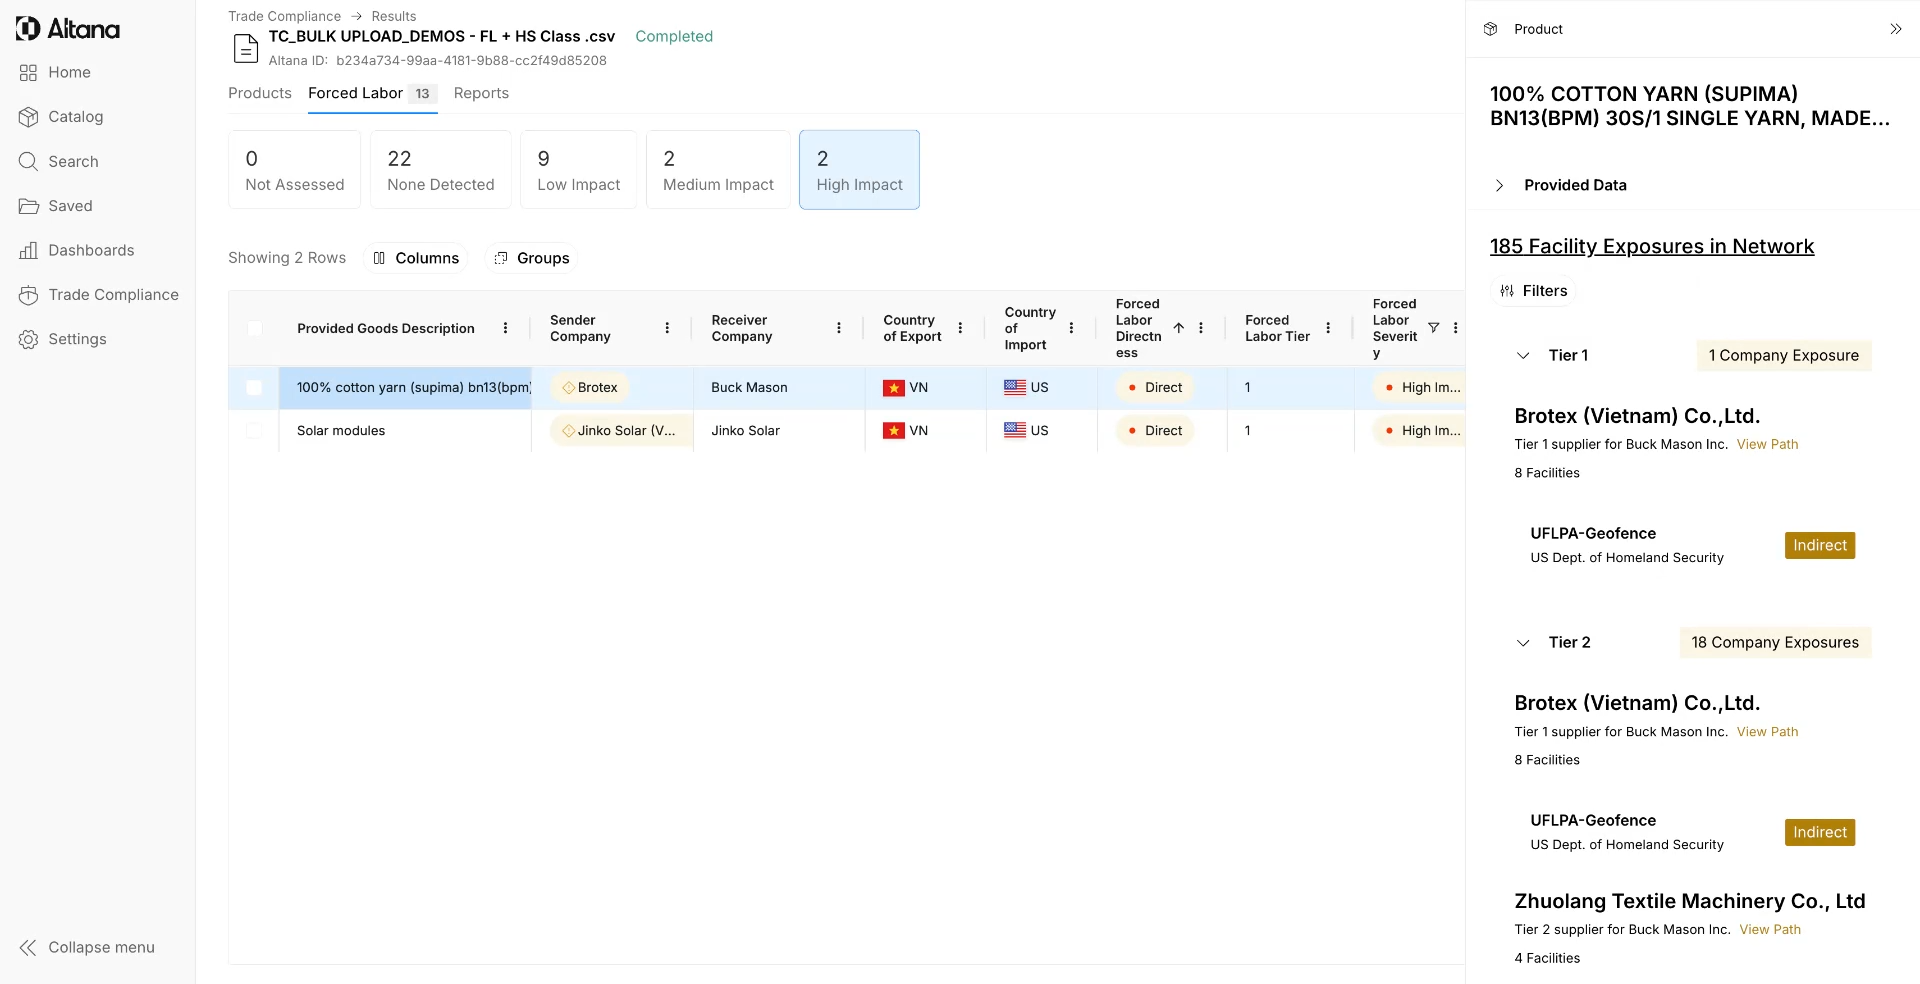
Step 6: Click on a product with an identified exposure to glean more insights into the nature of the risk.
Step 7: Users can view all exposed facilities across the product's value chain by clicking the total number of Facility Exposures in Network and view the details of each exposure at each tier.
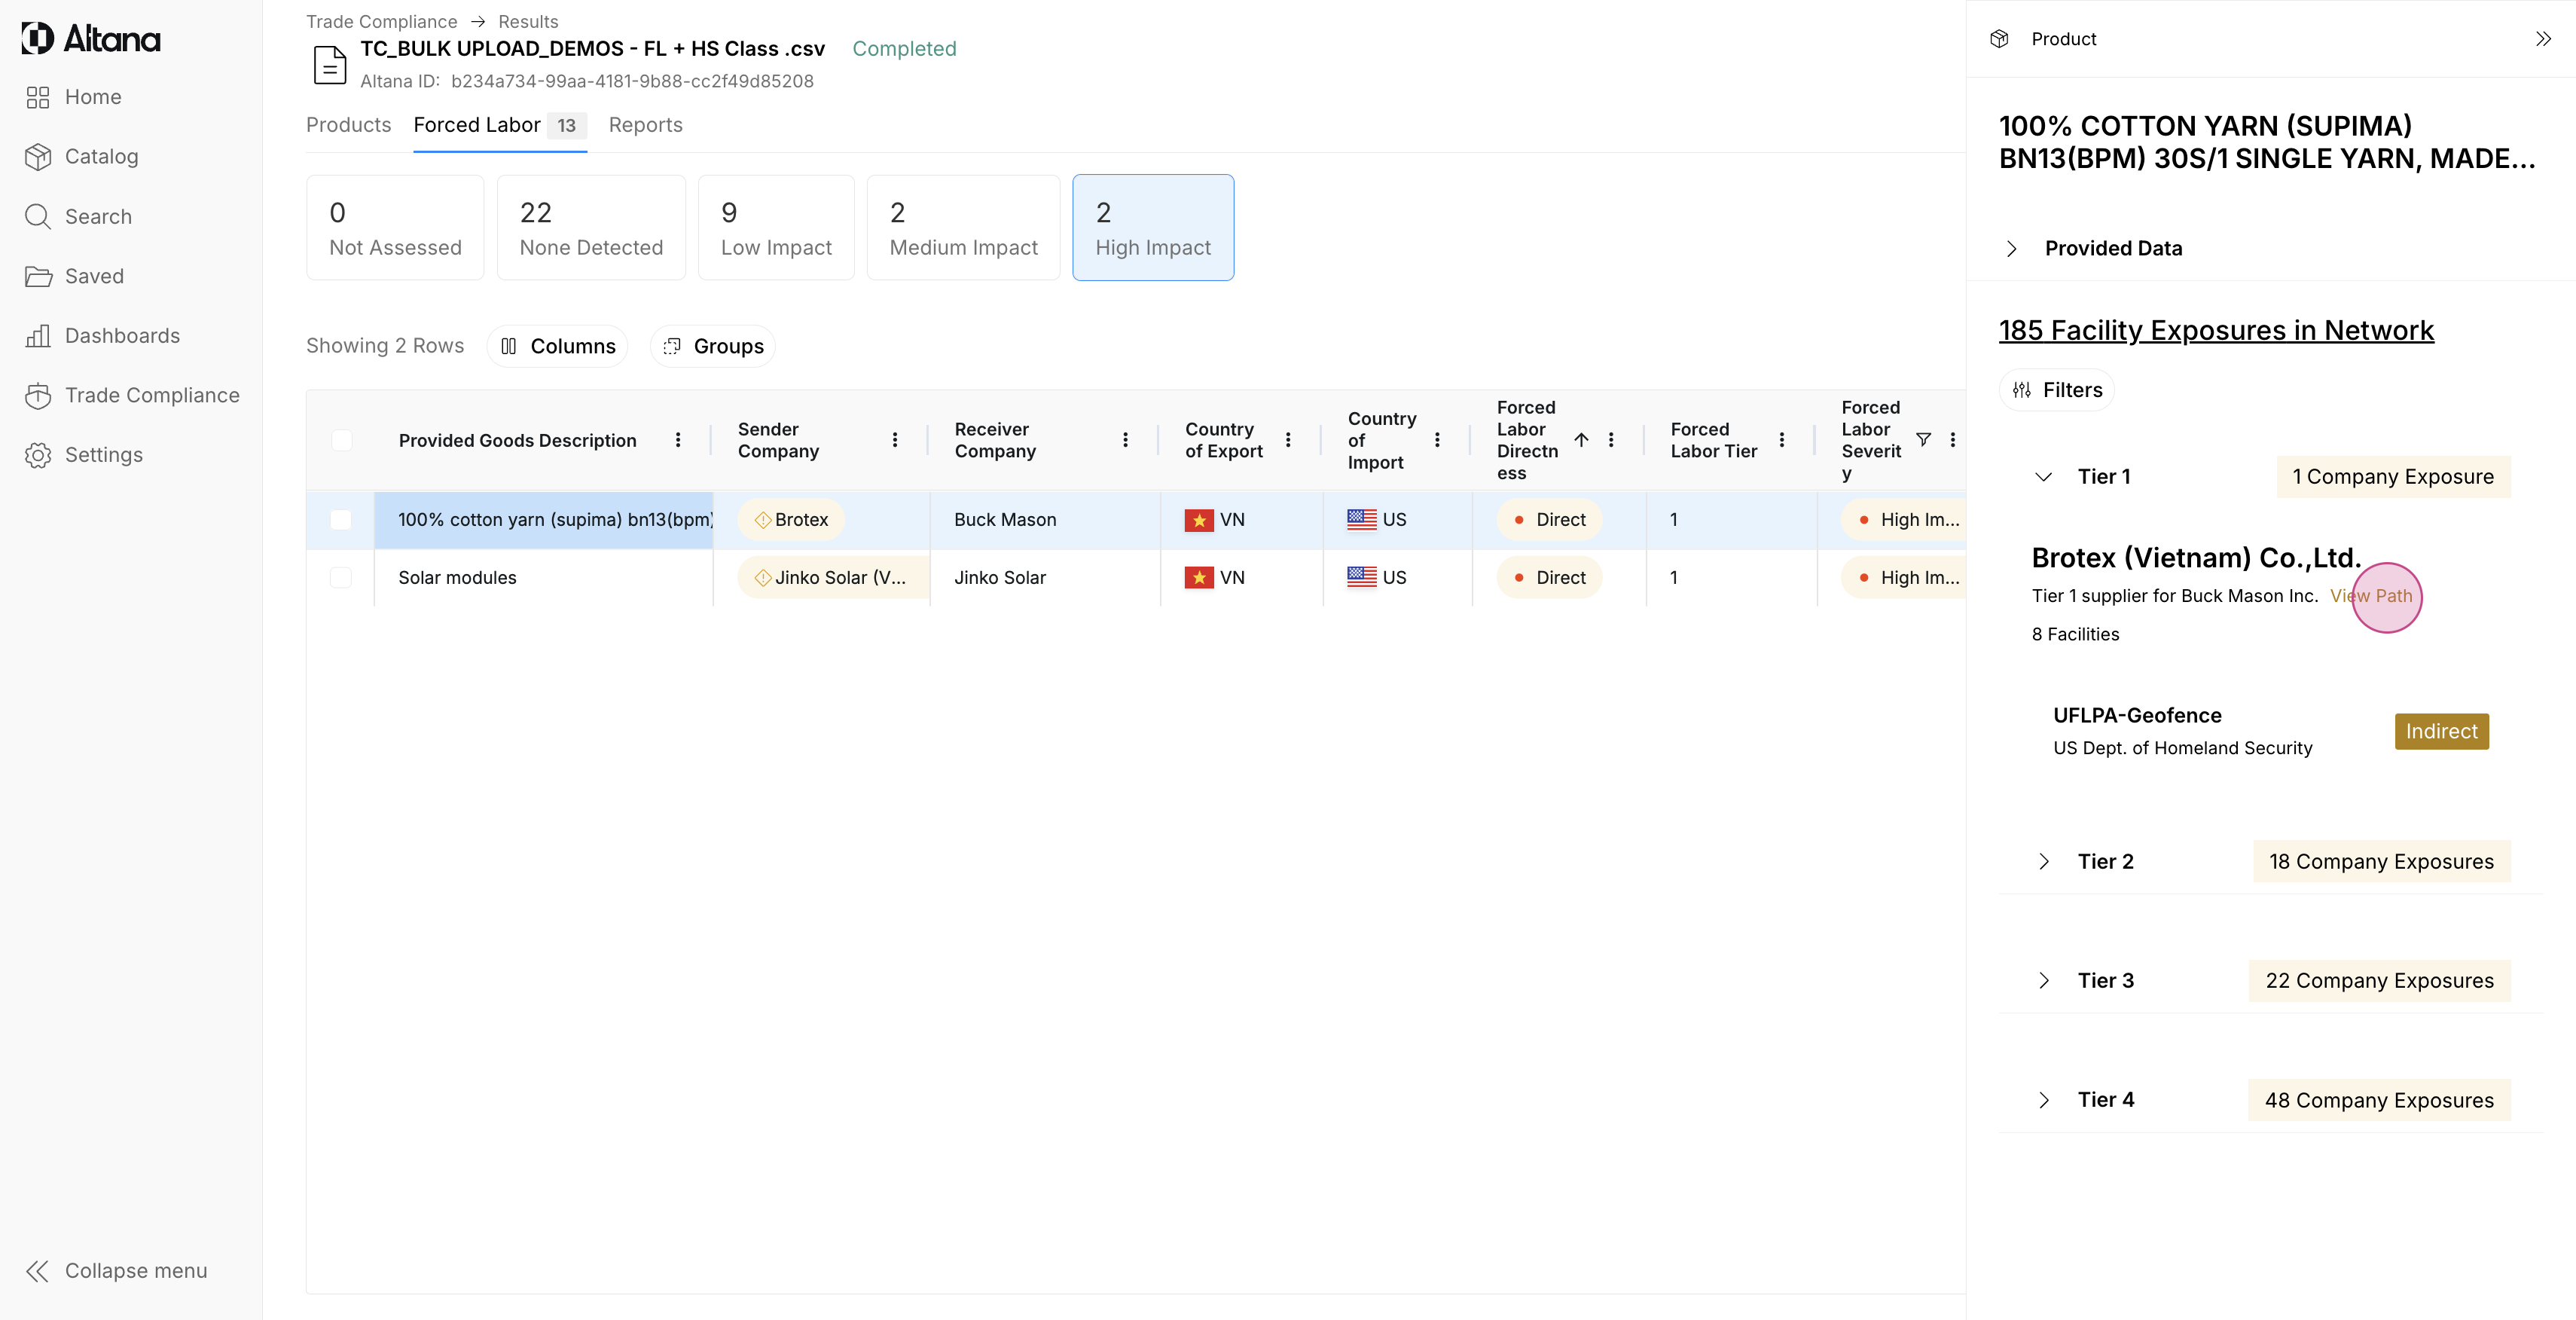
Step 8: Additionally, Altana offers the ability drill in to the details of a specific exposure path by clicking View Path of an exposed company.
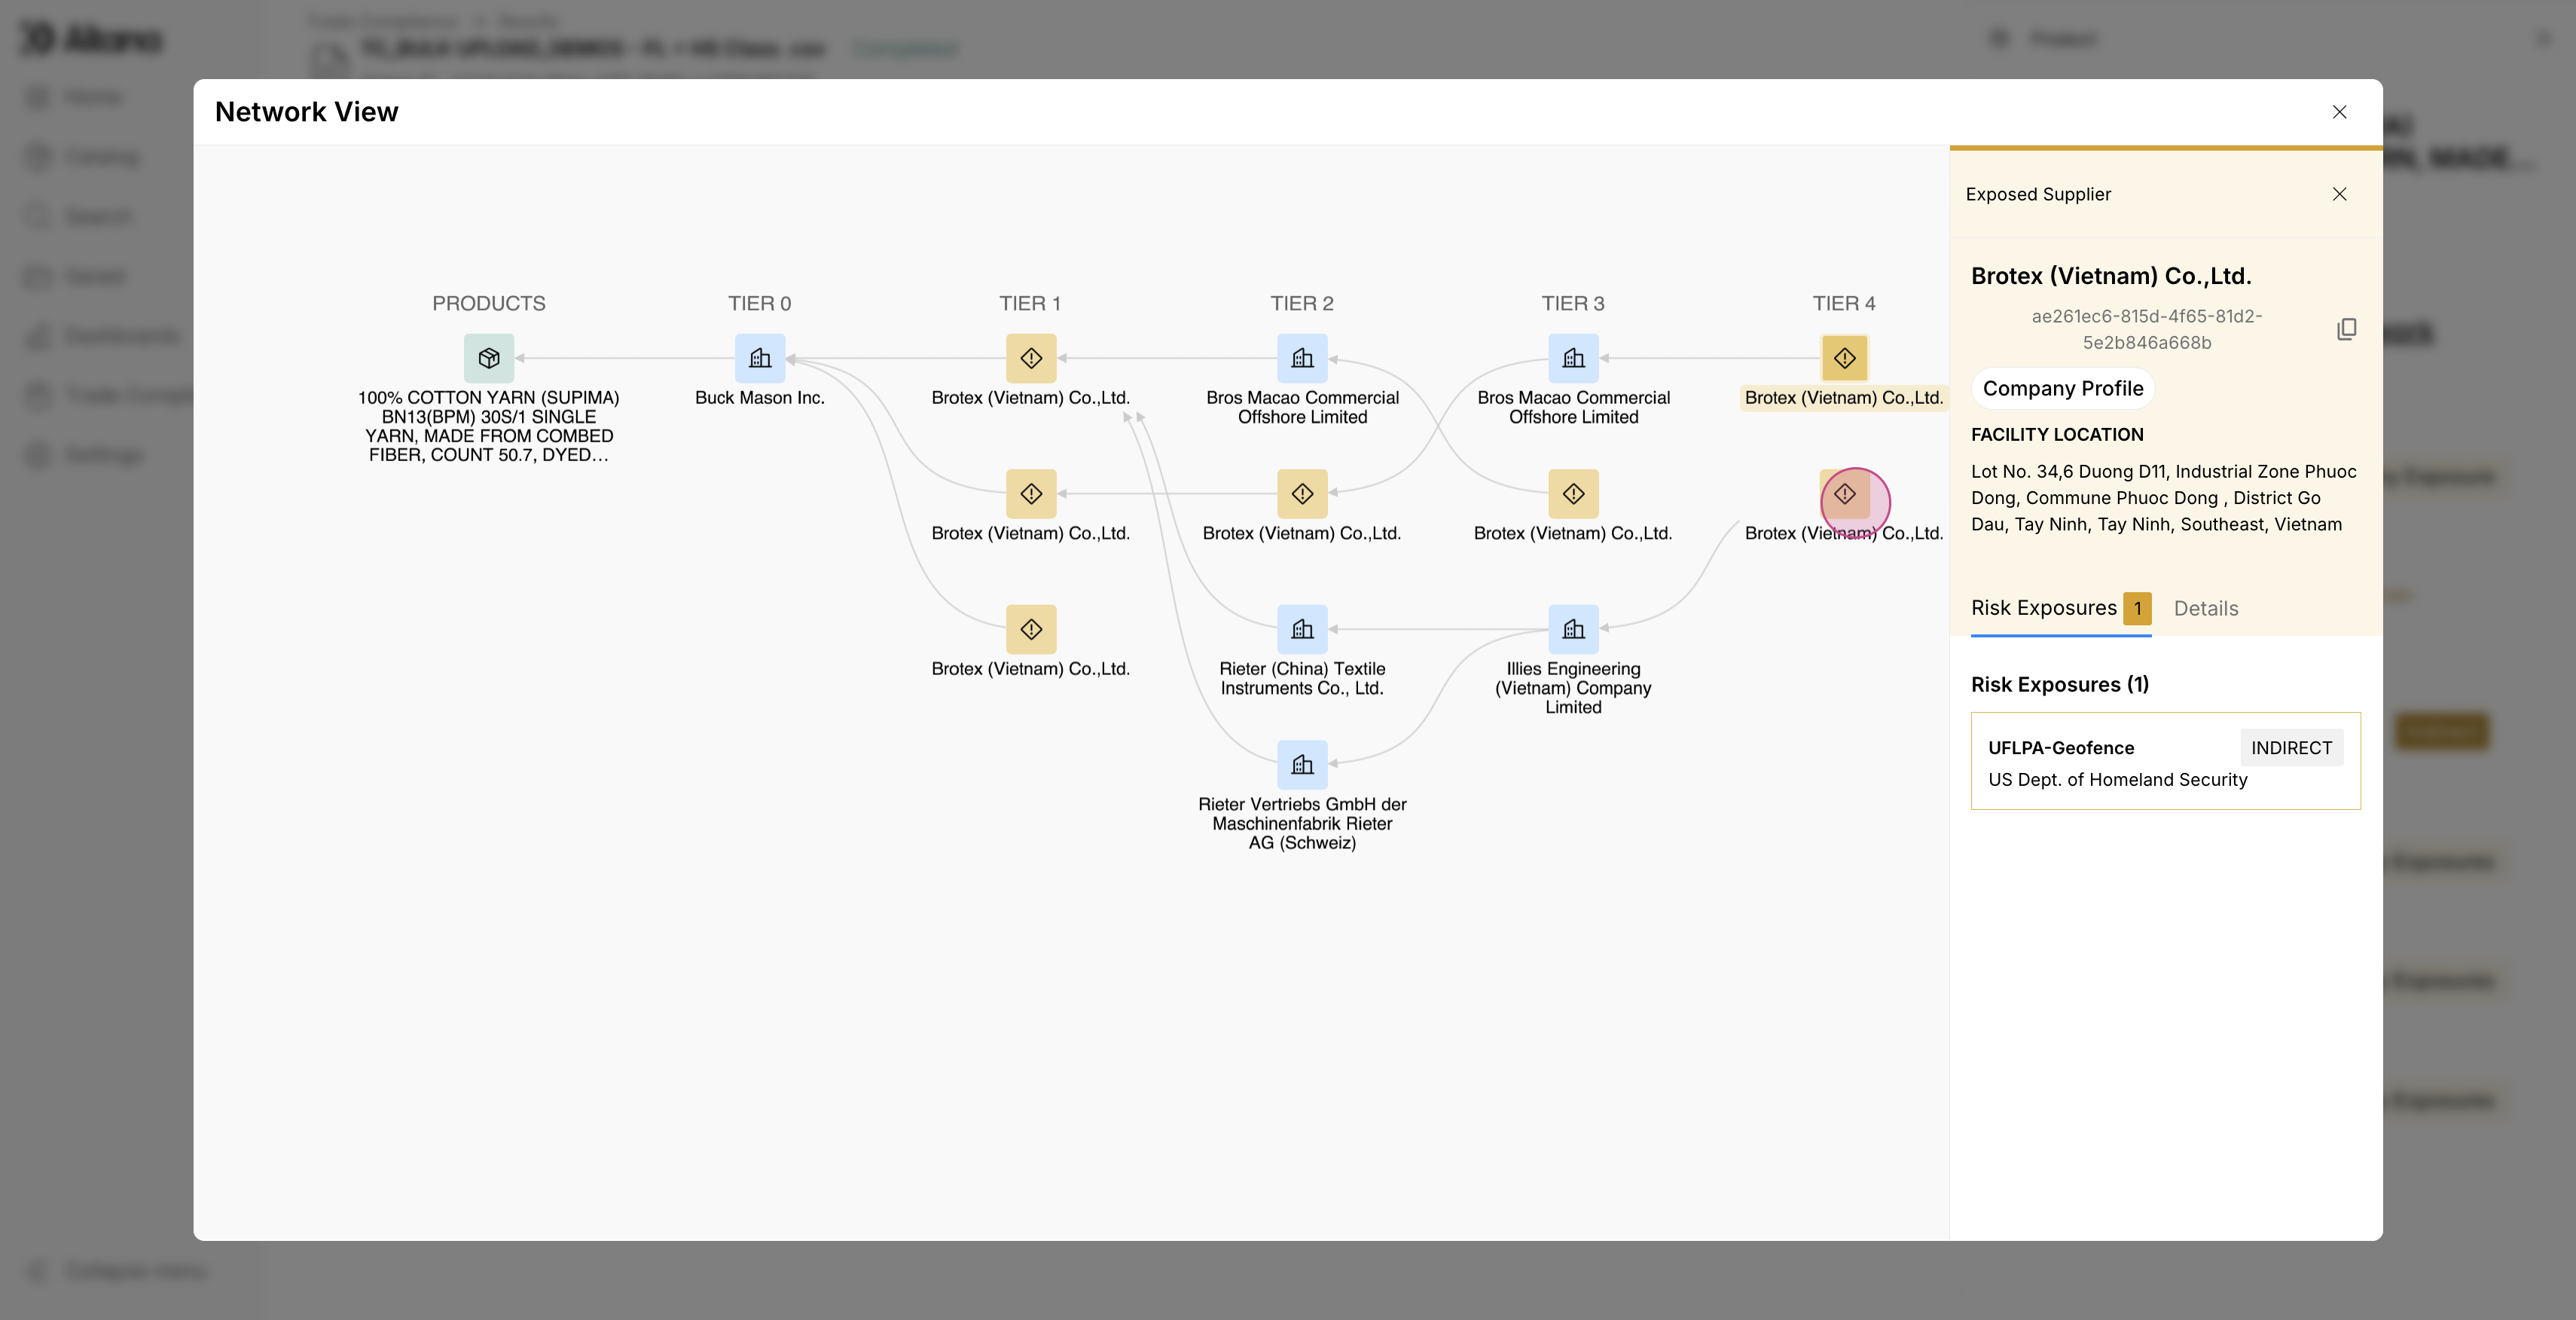
Step 9: When viewing an exposure path, users can see a consolidated view of the product's value chain with the relevant relationships between the product and the exposed company. Note: Exposed companies (highlighted in yellow) may appear more than once in the same tier and represent different facility locations of the exposed entity.
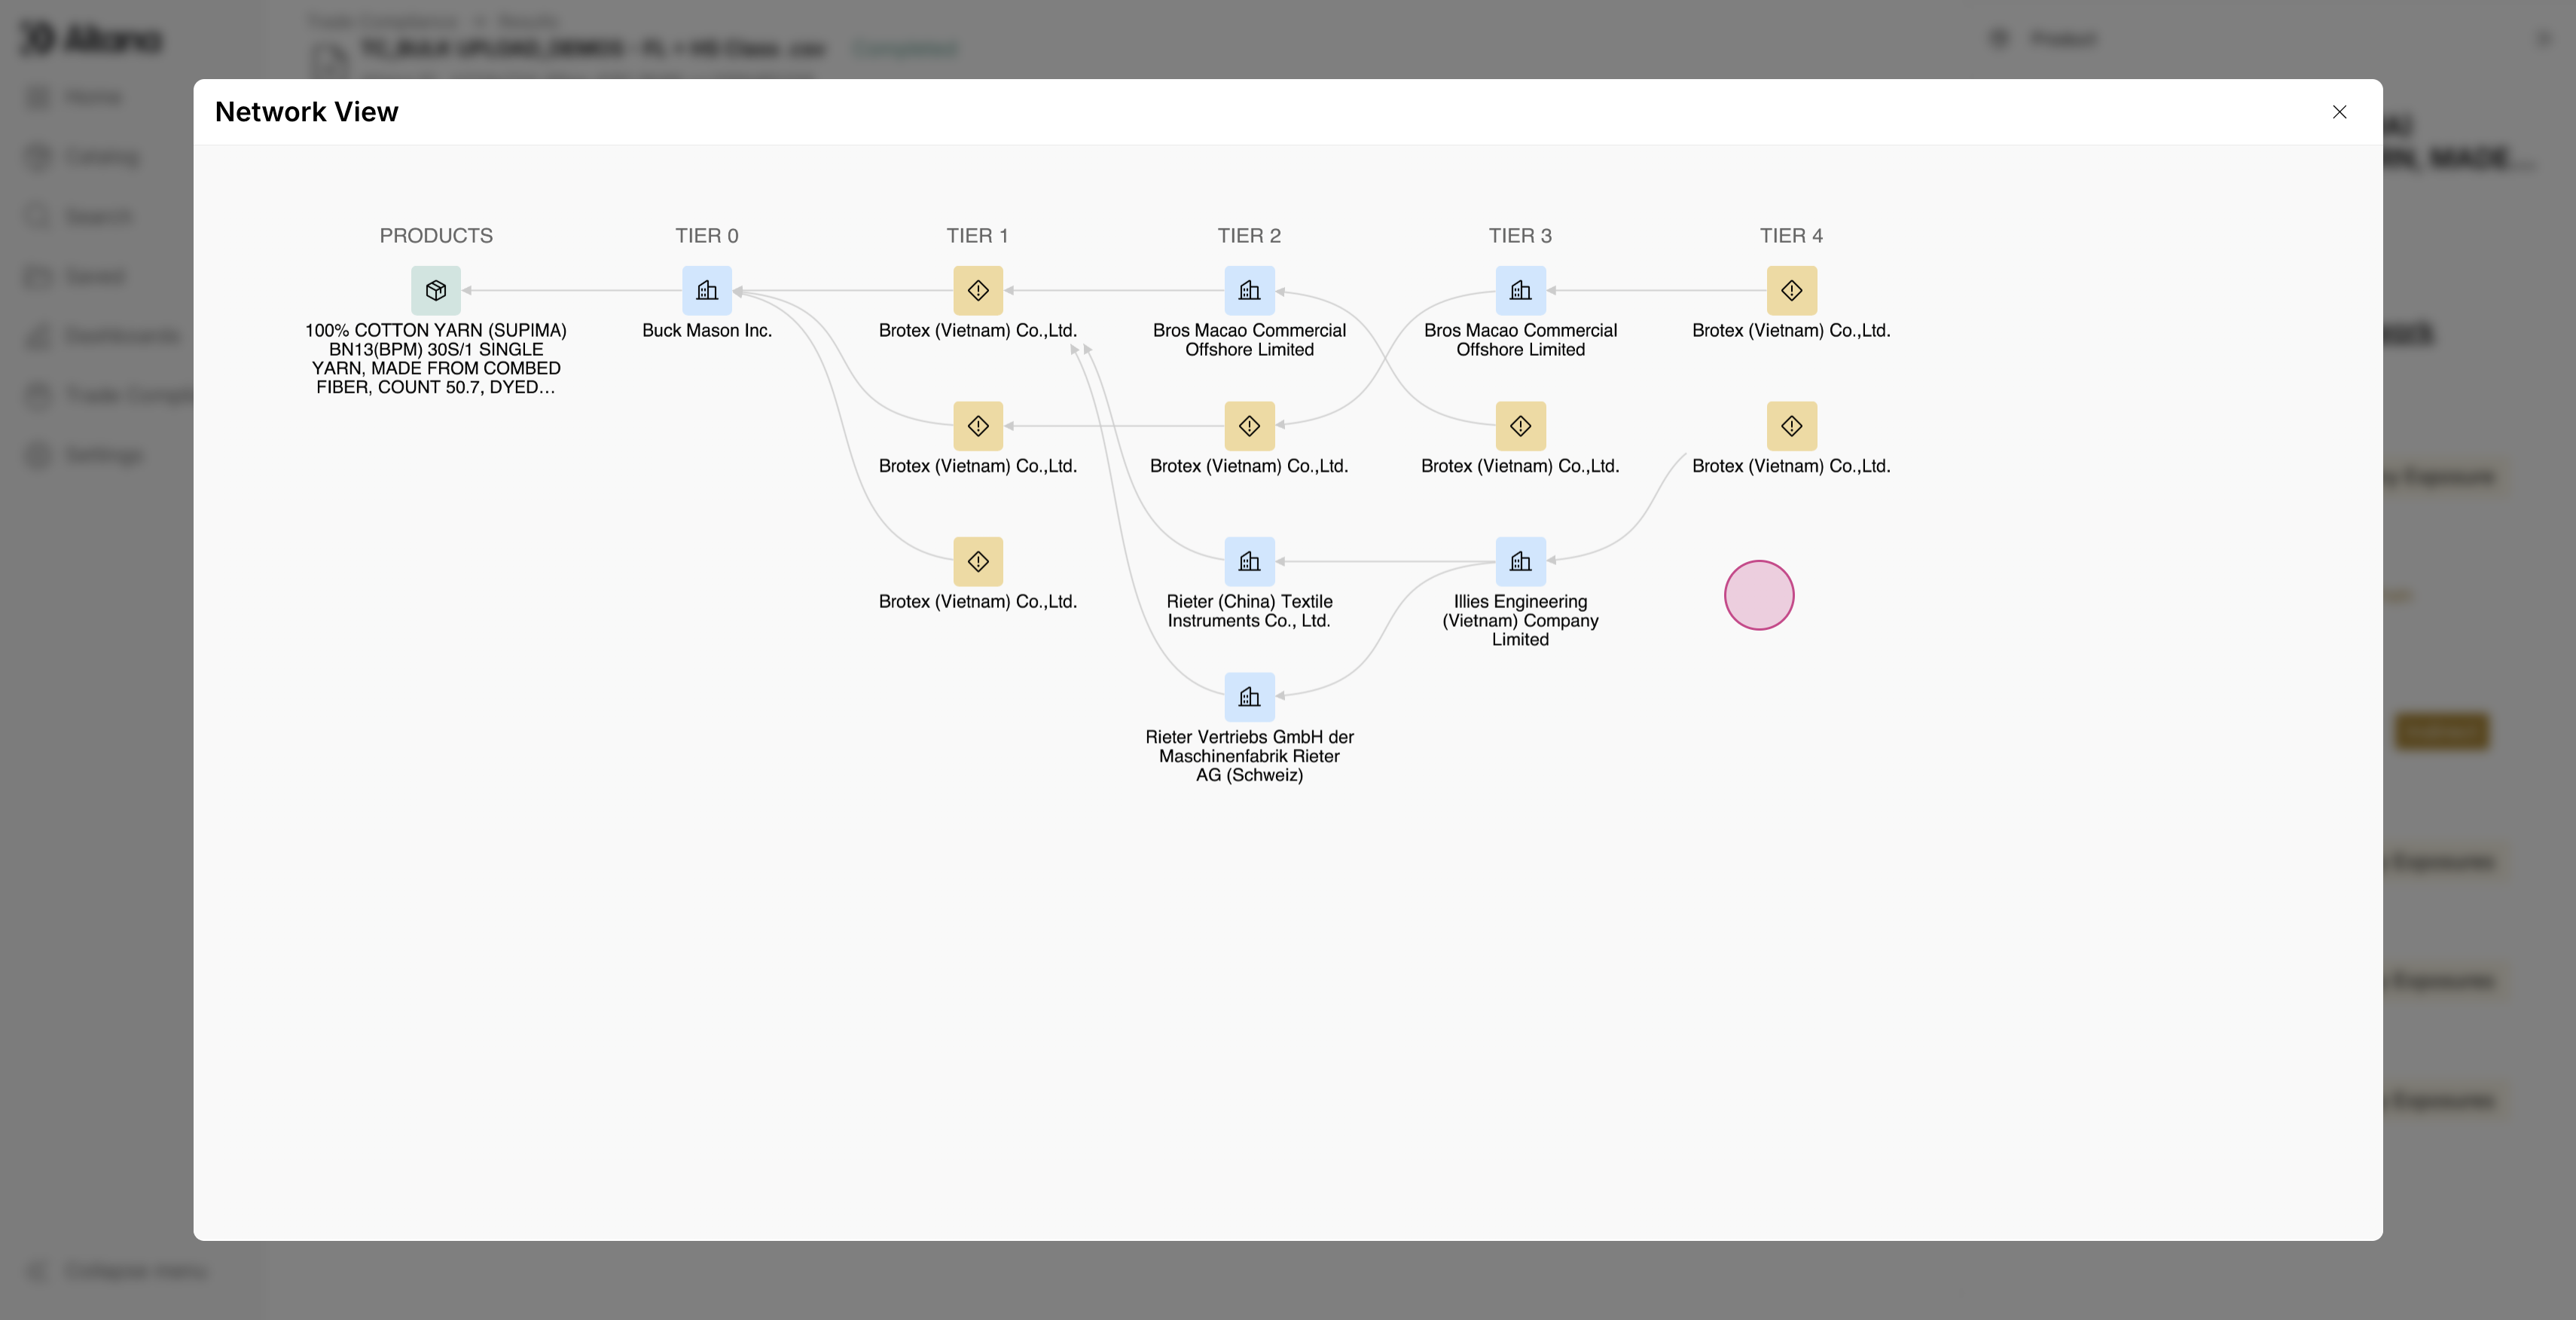
Step 10: Clicking on a company name will reveal additional information about the exposure, including the type of risk, the directness of the risk, as well as information about the facility location (if available).
Step 11: Clicking the arrows between two entities allows users to see the historical transactions as the product evolves across its value chain, providing users insights into how it evolves from raw materials and base components. The historical transactions are pulled from Altana's knowledge graph and will include granular shipment details, including the transaction date, mode of transportation, and more.

By following these steps, users will be able to interpret the results of Altana's transaction screening tool, understand how to prioritize and glean necessary insights into identified exposures, ultimately enabling a path towards action and remediation.