Altana Forced Labor Transaction Screening Workflow Overview
Protect Your Customers From Forced Labor With Forced Labor Transaction Screening
Gain exclusive access to the same Product Network used by CBP to identify forced labor within value chains.
Forced Labor Transaction Screening allows you to screen shipments at the transaction level to detect potential forced labor exposure, reaching beyond Tier 1 suppliers to uncover risk deep within a product’s multi-tier value chain.
Step 1: Understand the Altana transaction screening workflow
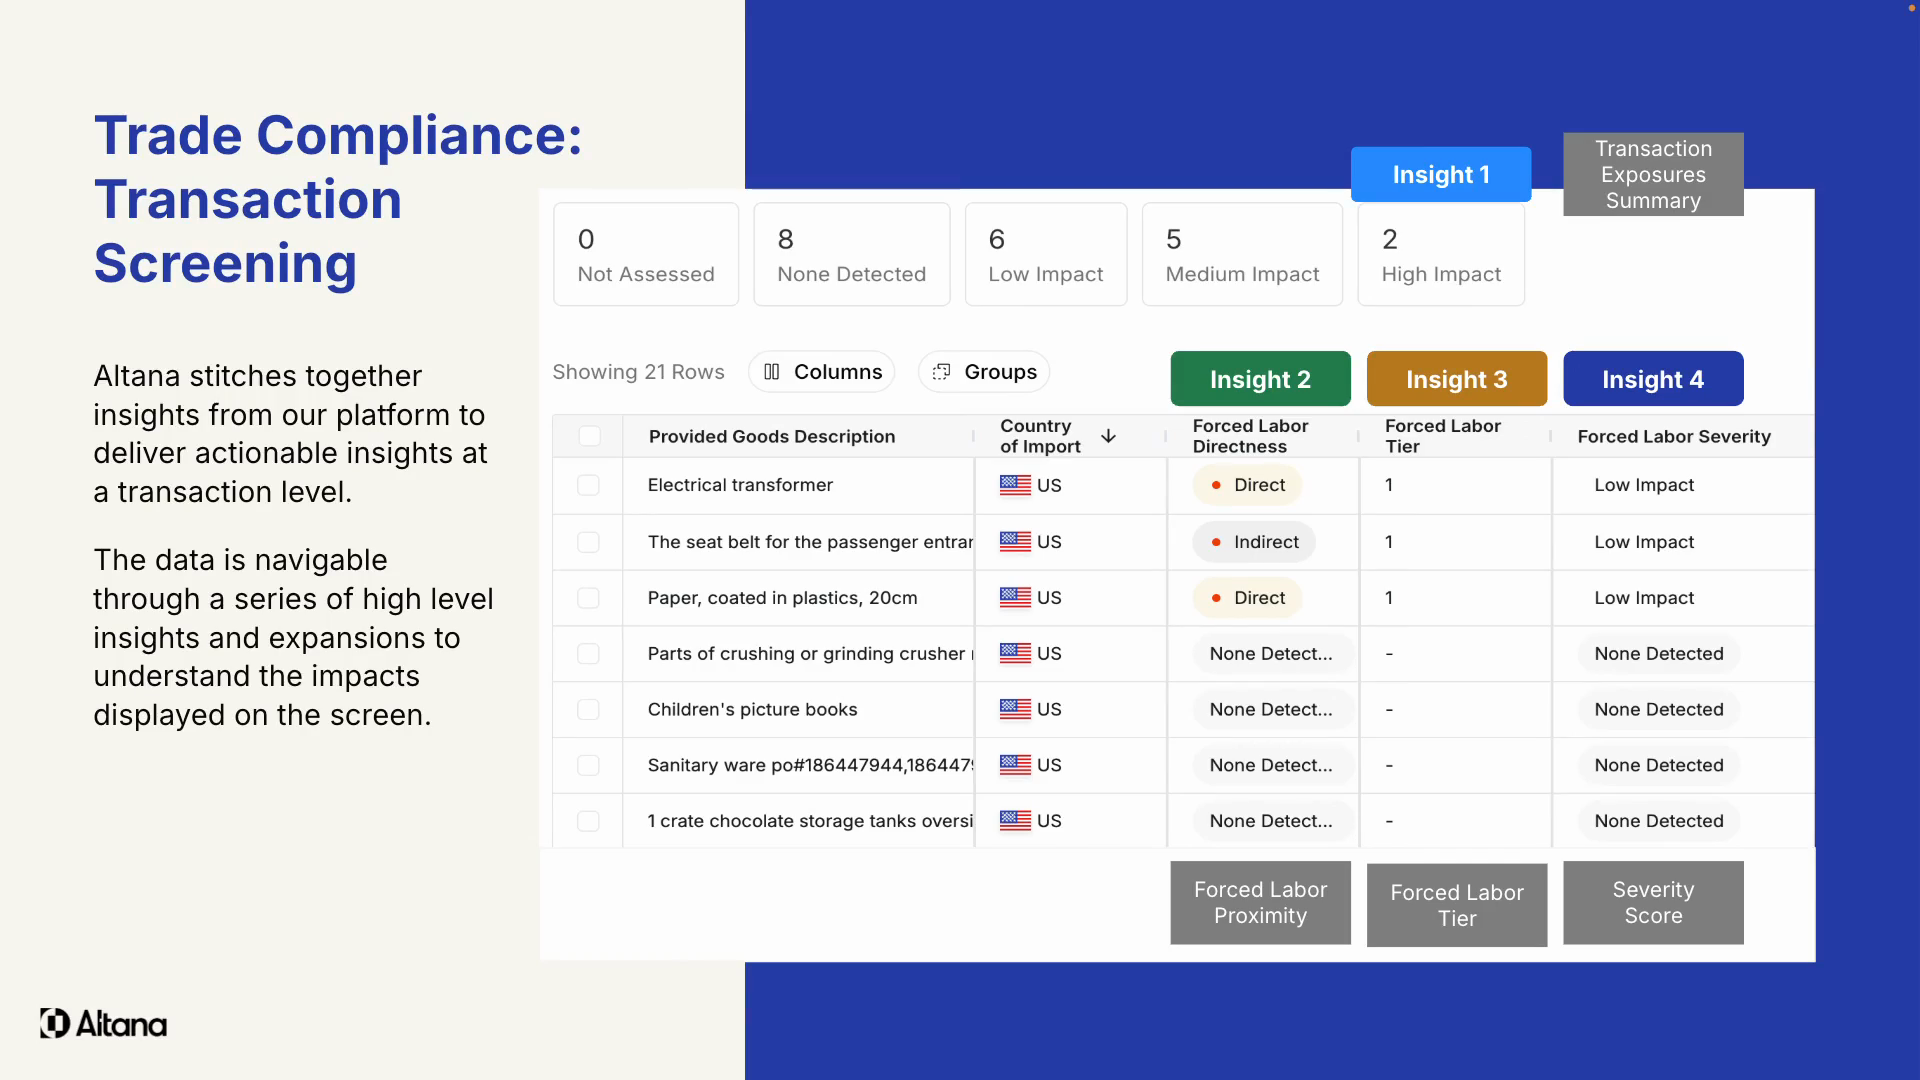
The Altana transaction screening workflow provides insights at the transaction level. It offers a summary of exposed entities, their proximity or directness, the tier of the closest exposure detected within the transaction, and a severity score.
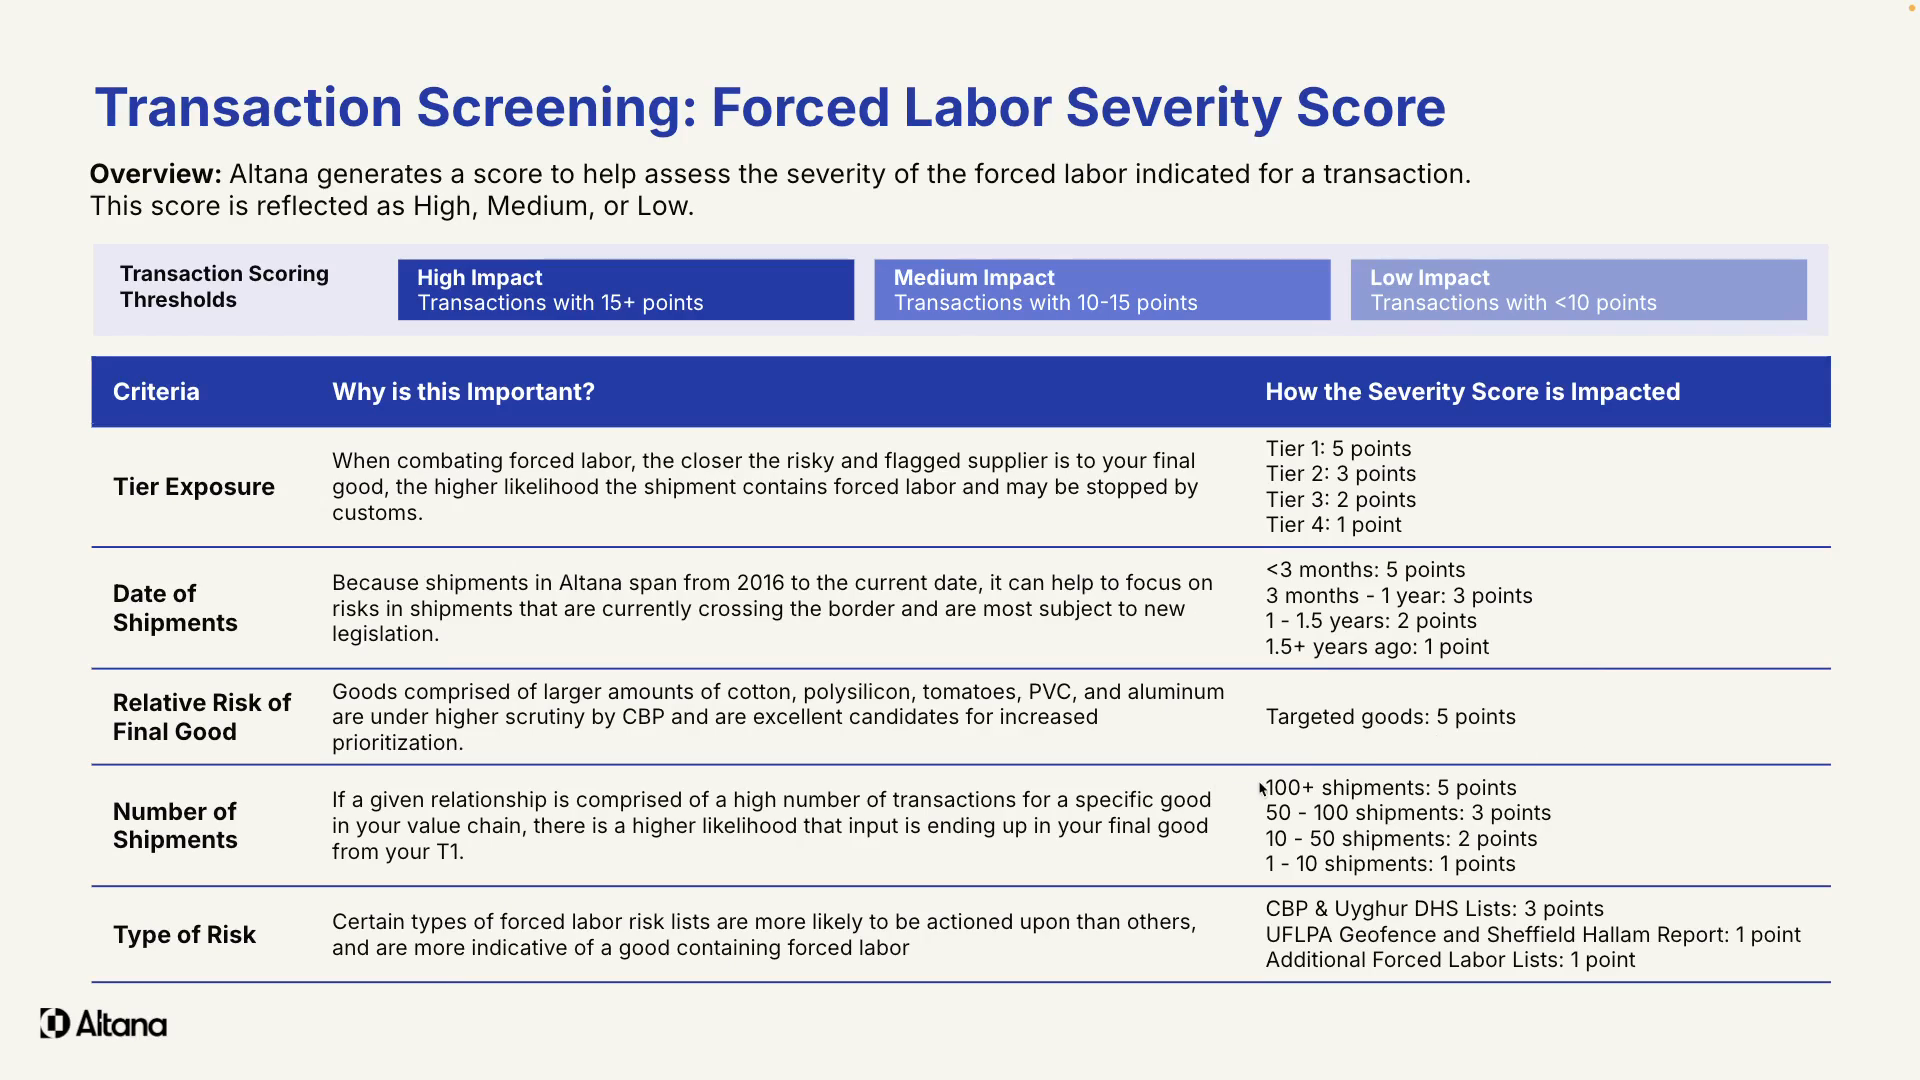
Step 2: Understand the severity score
The severity score is categorized as high, medium, or low. It's a scoring methodology adapted by many of Altana's importer customers to enable scalability for logistics service provider customers. It takes into account the tier of the closest exposure, the date of shipments between exposed entities, and if the final good contains materials under high scrutiny from customs.
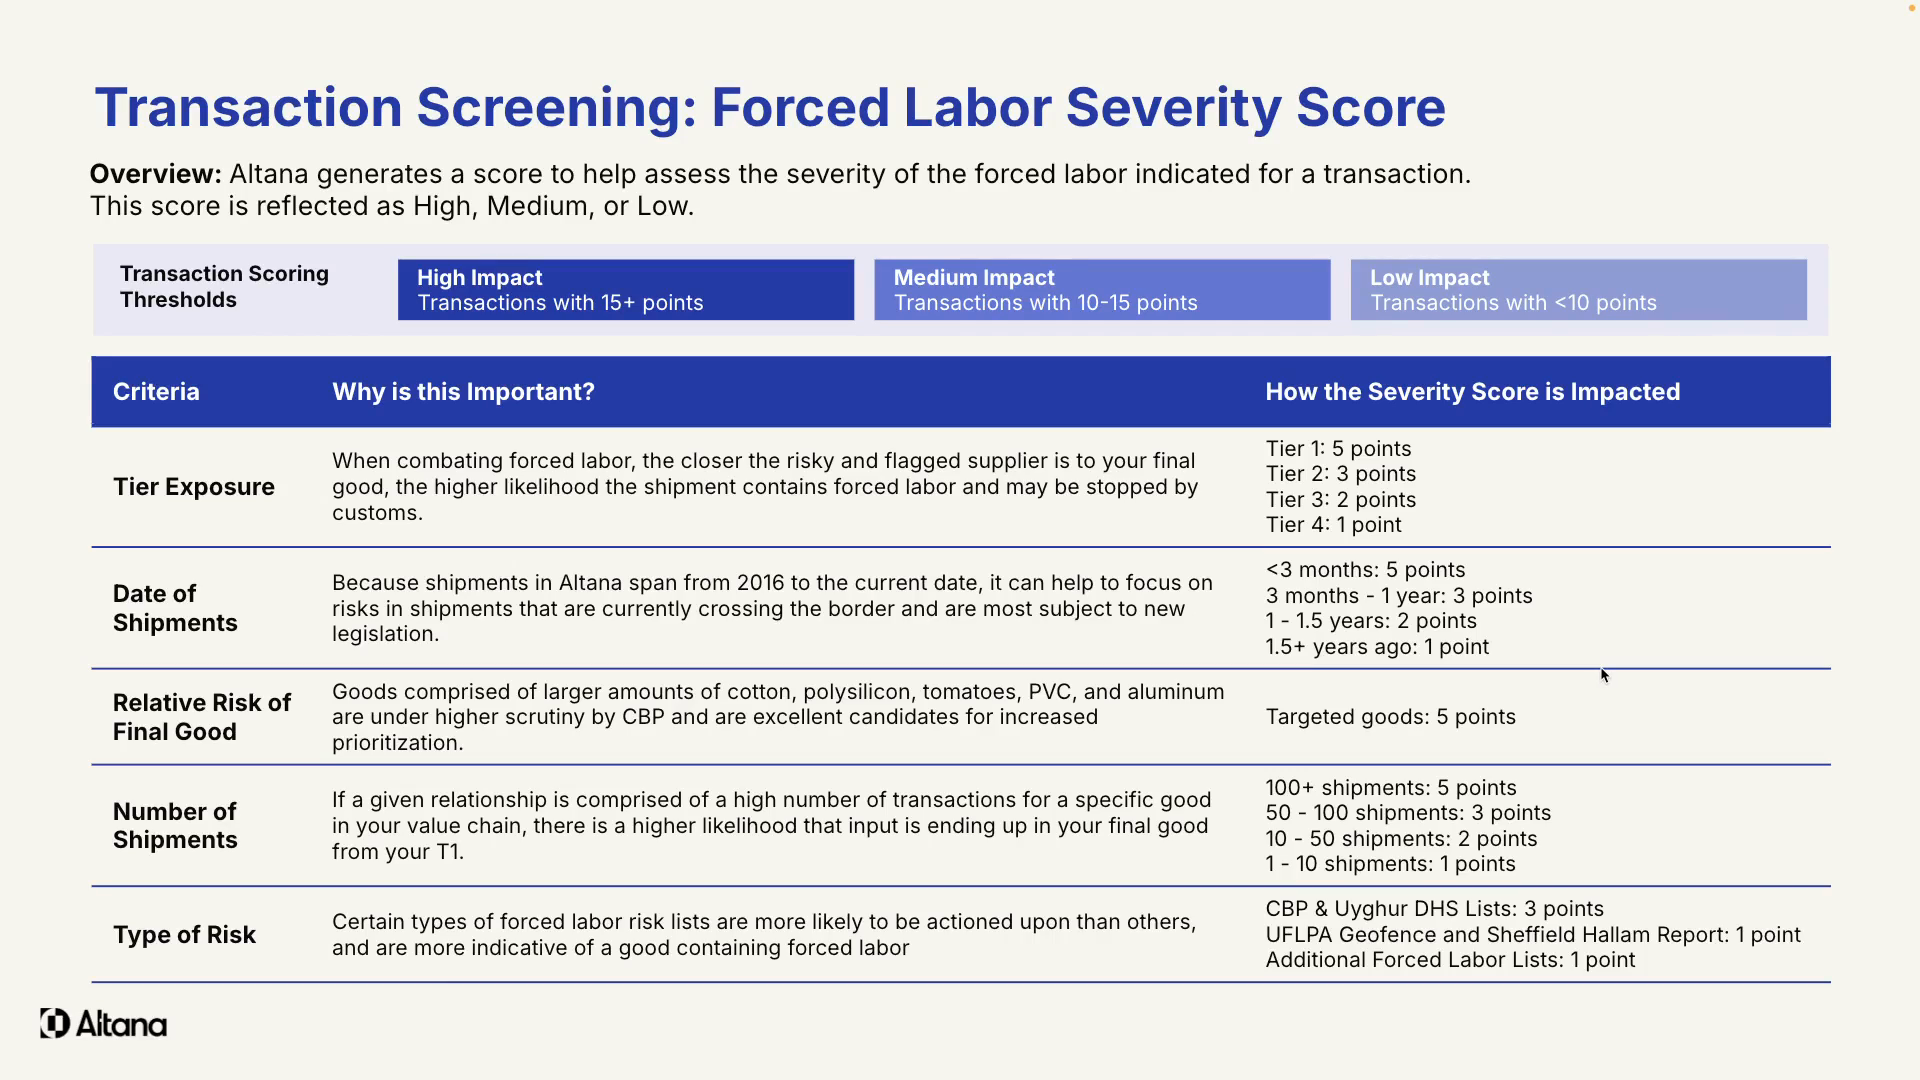
Step 3: Understand the factors influencing the severity score
Initially, materials under high scrutiny included cotton, polysilicon, PVC, but it's now expanded to seafood and other agricultural commodities. The score also considers the number of shipments between exposed entities, indicating the strength of the business relationship. The source of the risk flag also influences the score, with US Customs and Homeland Security lists carrying the highest weight.
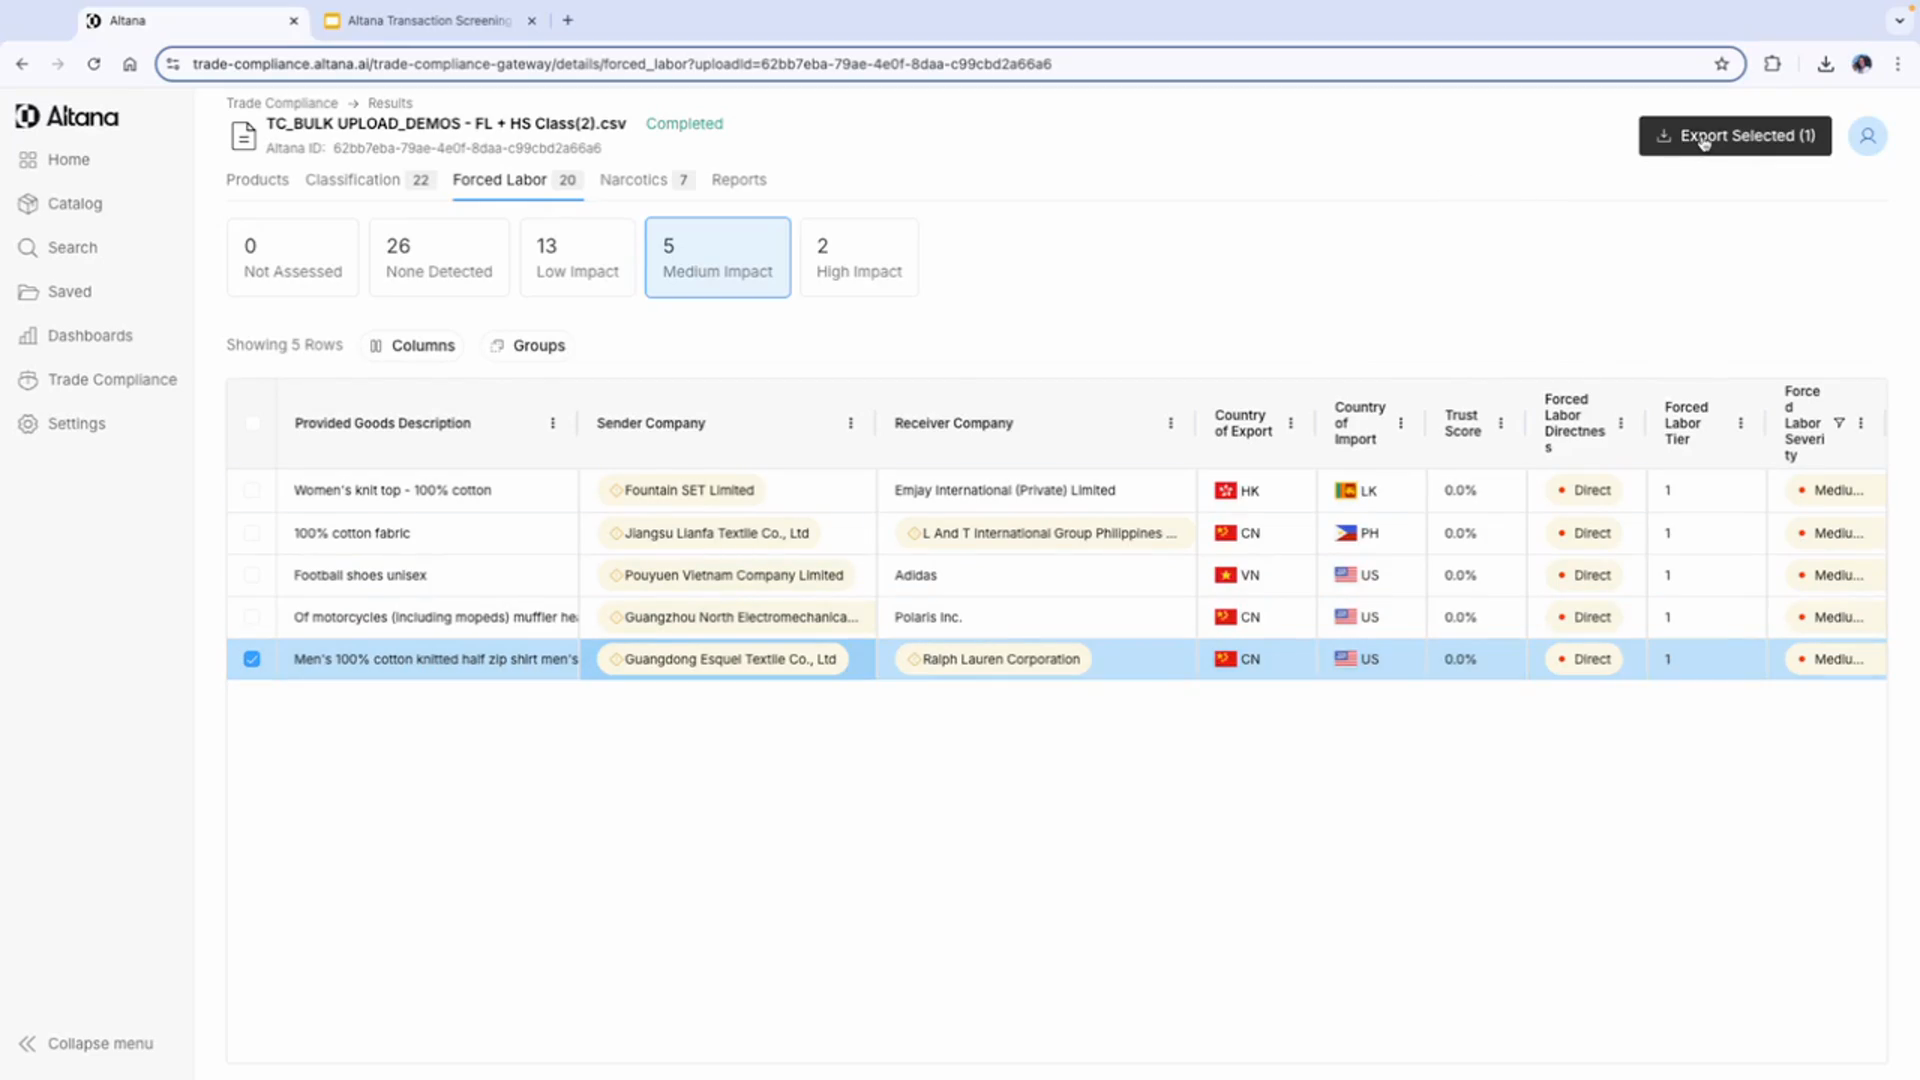
Step 4: Upload and assess transaction data
Start by uploading your transaction data. This can be done at any point throughout the shipment life cycle. In this demo, we've uploaded a set of transactions, revealing twenty forced labor exposure flags, including two high impact and five medium impact exposures.

Step 5: Review specific transactions
Focus on specific transactions to understand the exposures within the network. For instance, in this demo, we're looking at a shipment from Guangdong Esquel Textile Co. to Ralph Lauren Company in the US. We notice an exposure on the tier one supplier from multiple Department of Homeland Security exposure sources. The severity score can be seen on the right hand
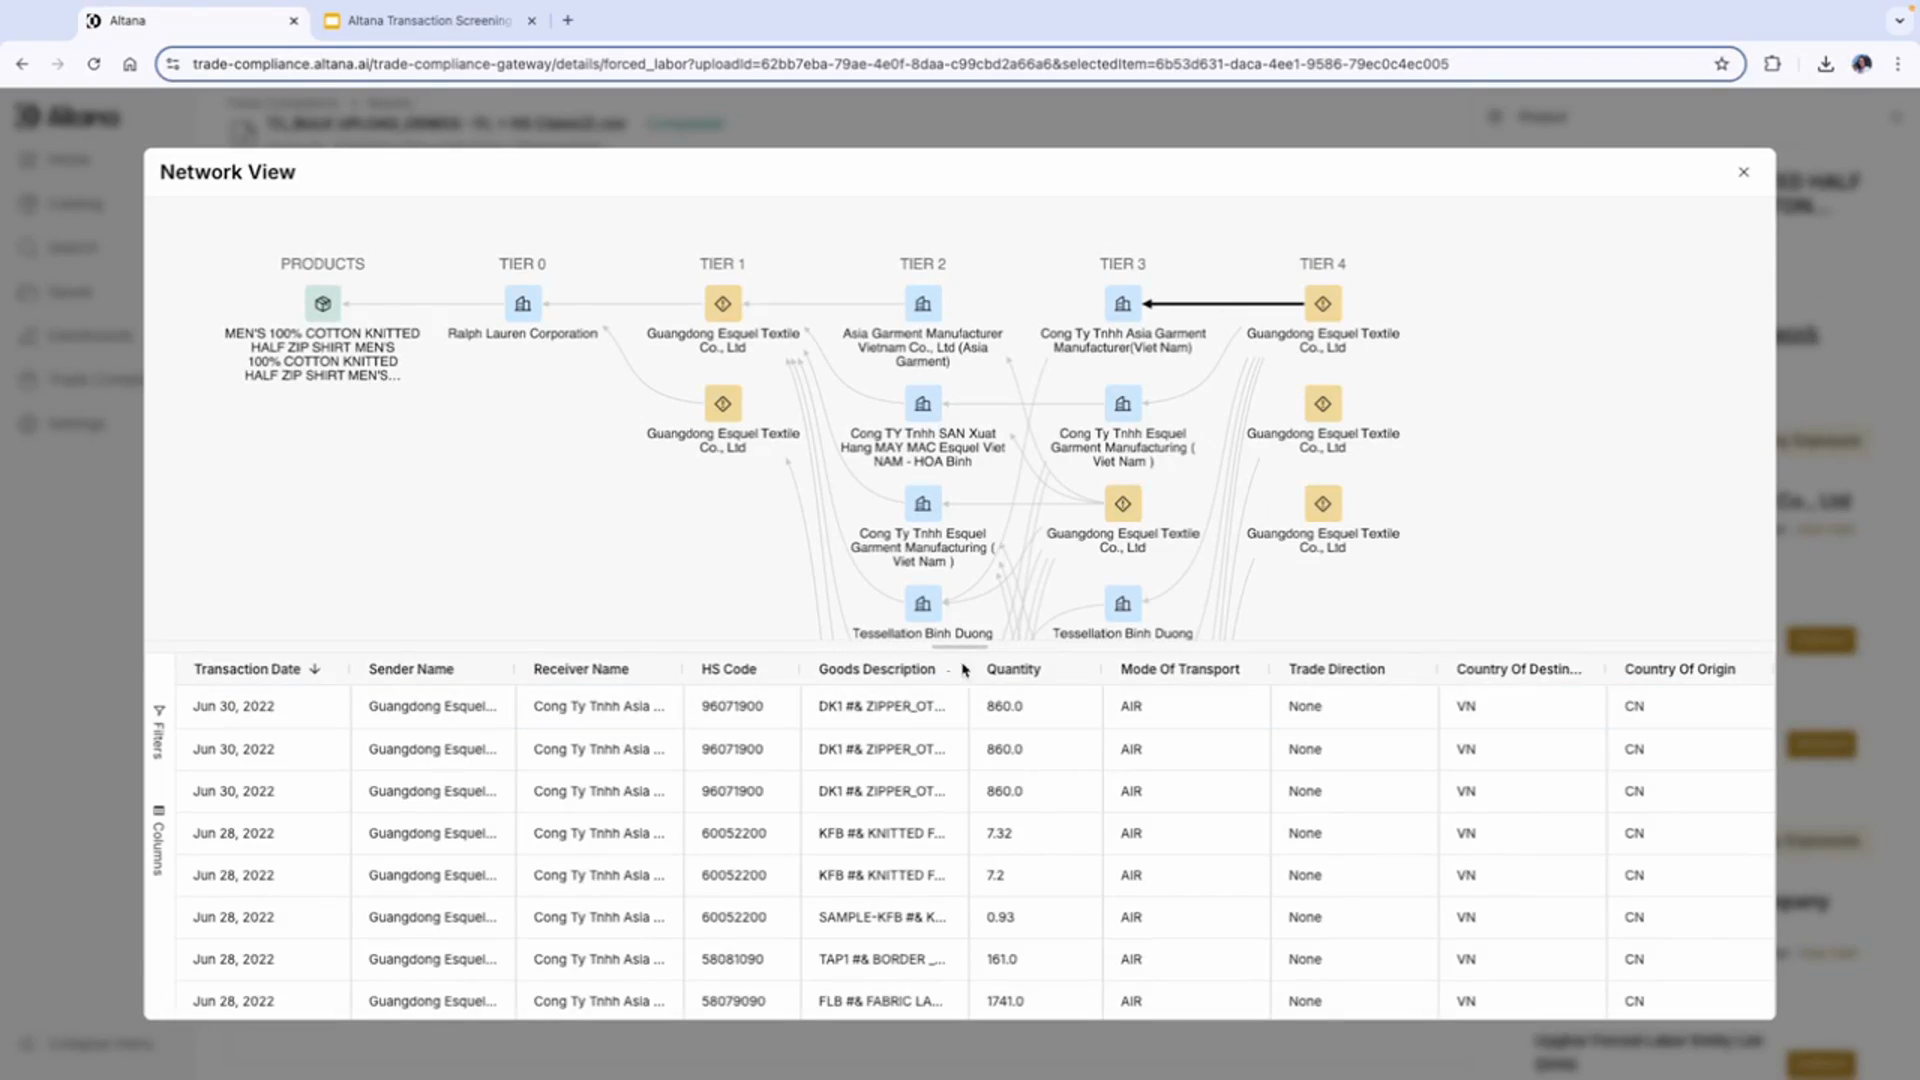
Step 6: View the supply path
To gather more information, view the supply path. Entities with exposures are denoted by yellow boxes.

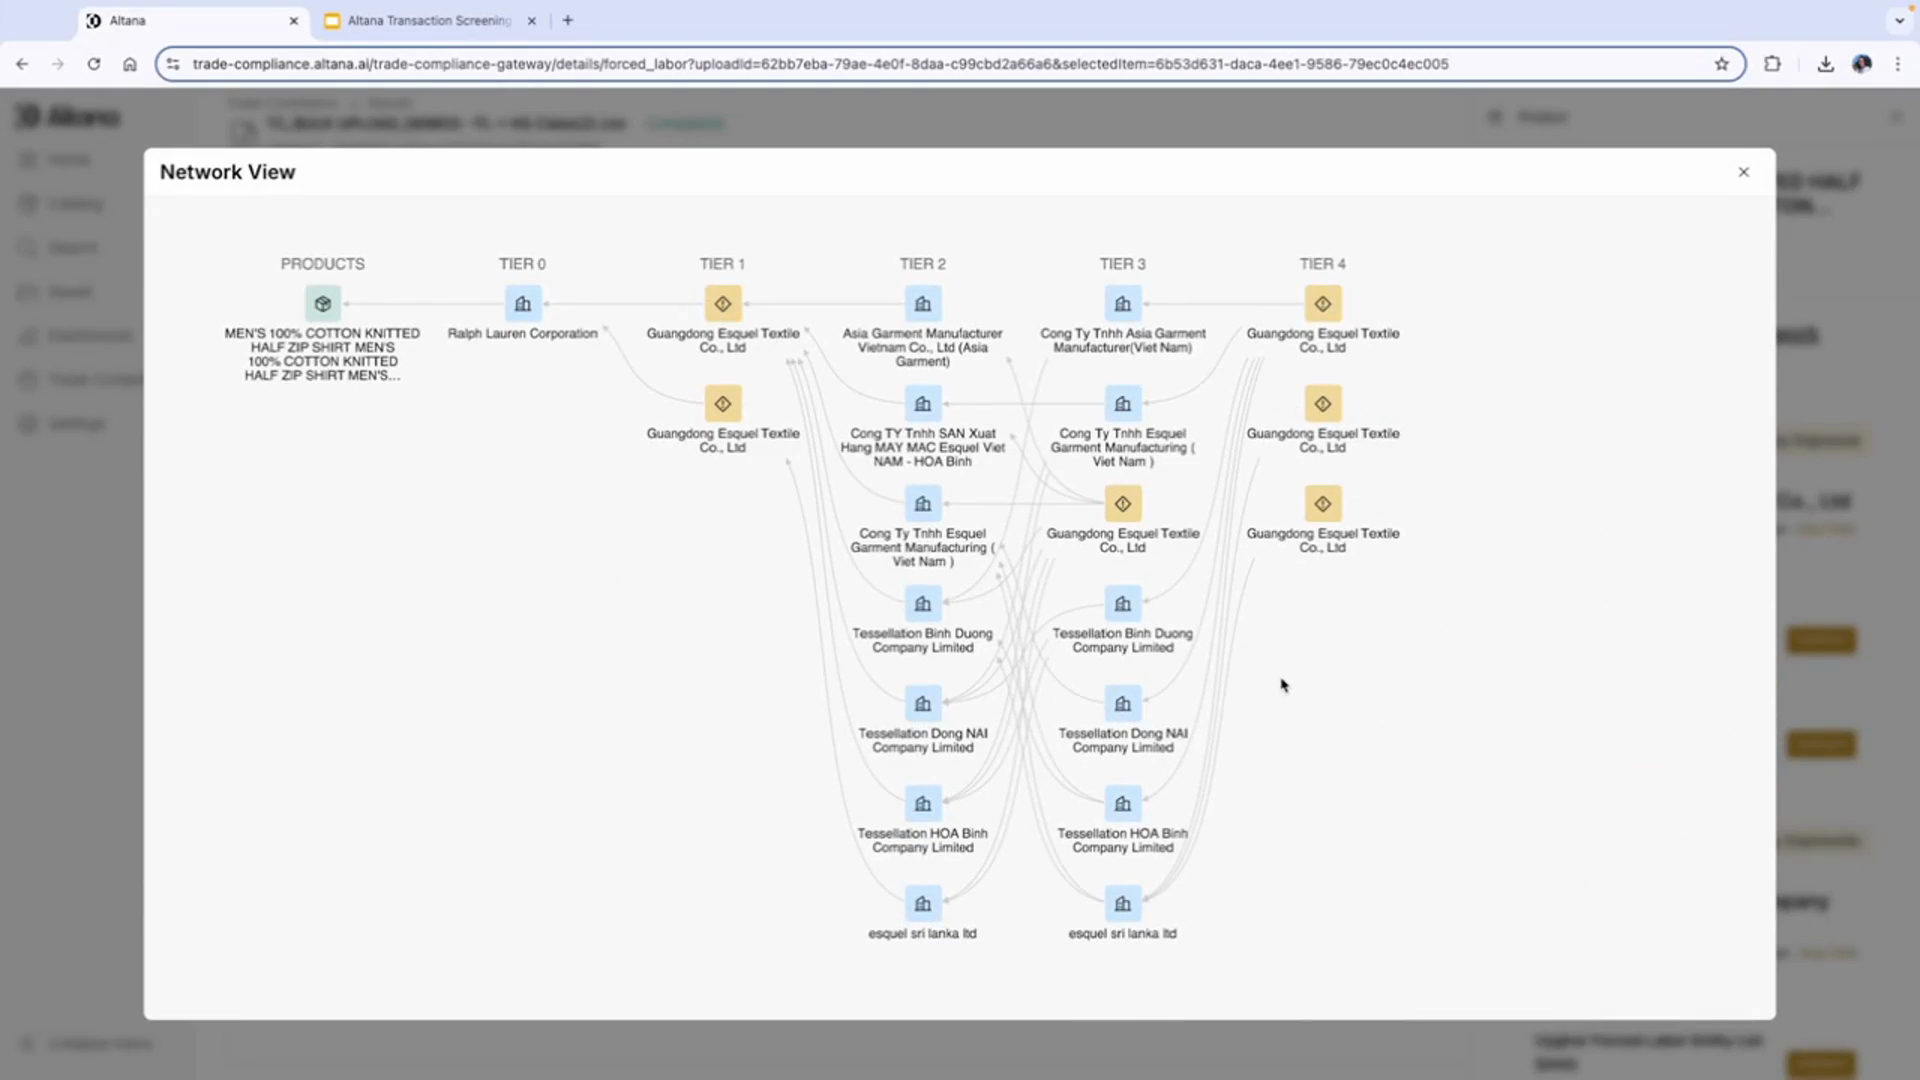
Step 7: Understand the network view
The network view outlines the entities involved in producing the finished product, including transactions between these entities.
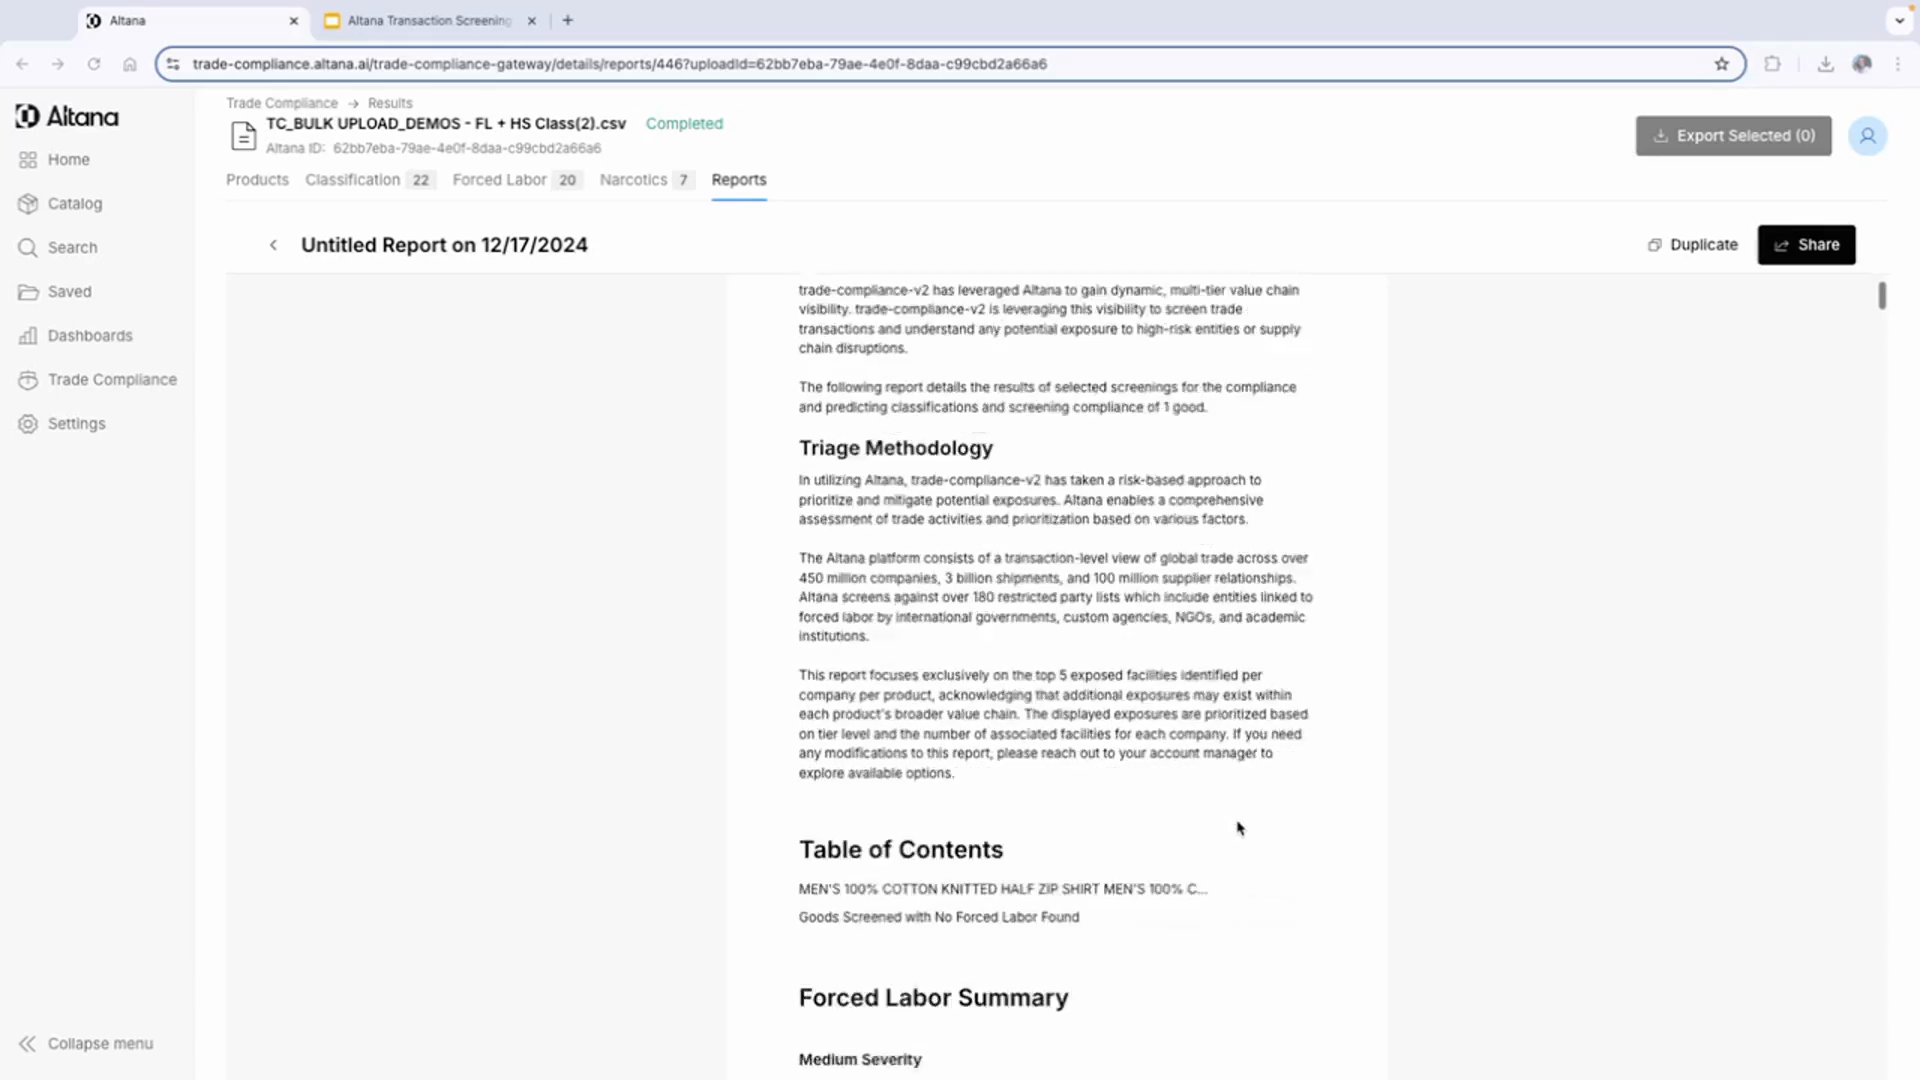
Step 8: Generate a report
Select the transaction and generate a report to surface the exposure to your customer. This allows them to decide the best path to mitigation.
Step 9: Configure the report
Configure the report to only include information on forced labor risk exposure. These reports can be co-branded with your company logo and are editable, allowing you to add any additional context or highlight specific sections.
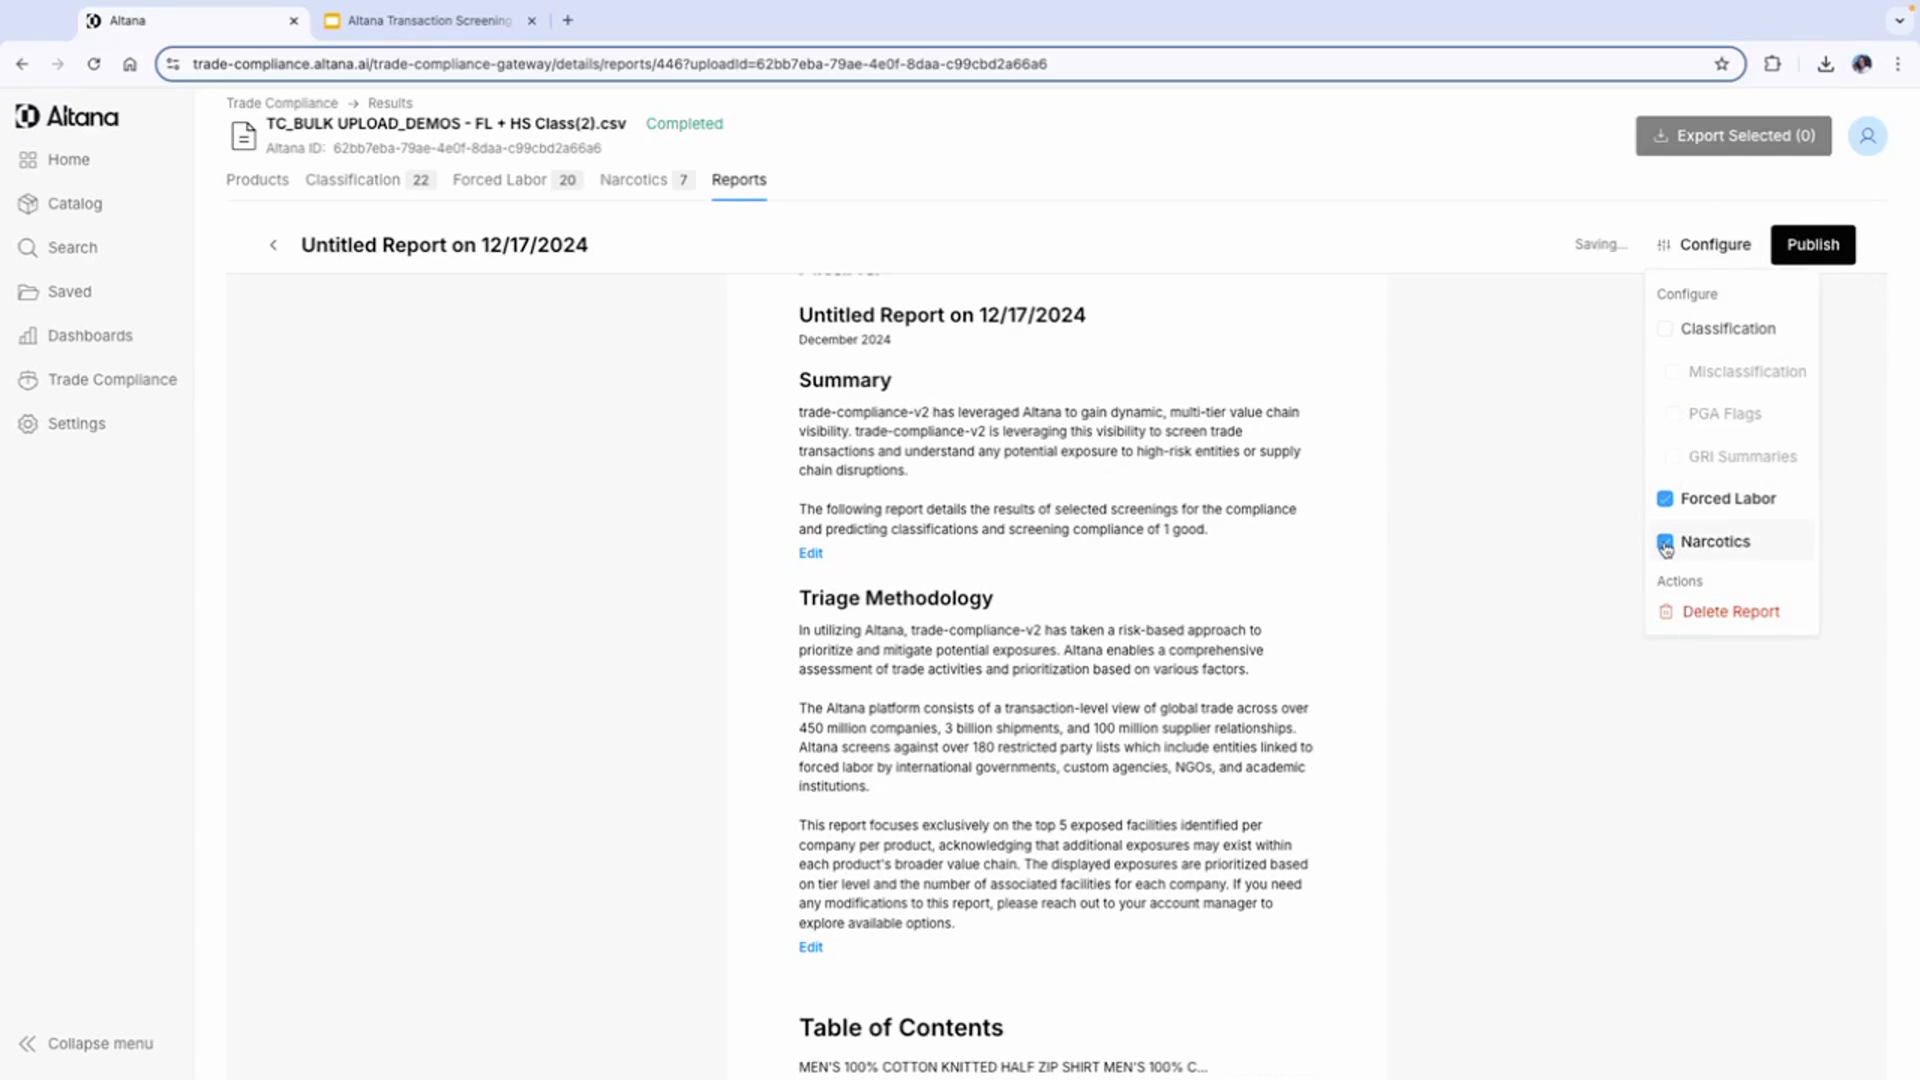
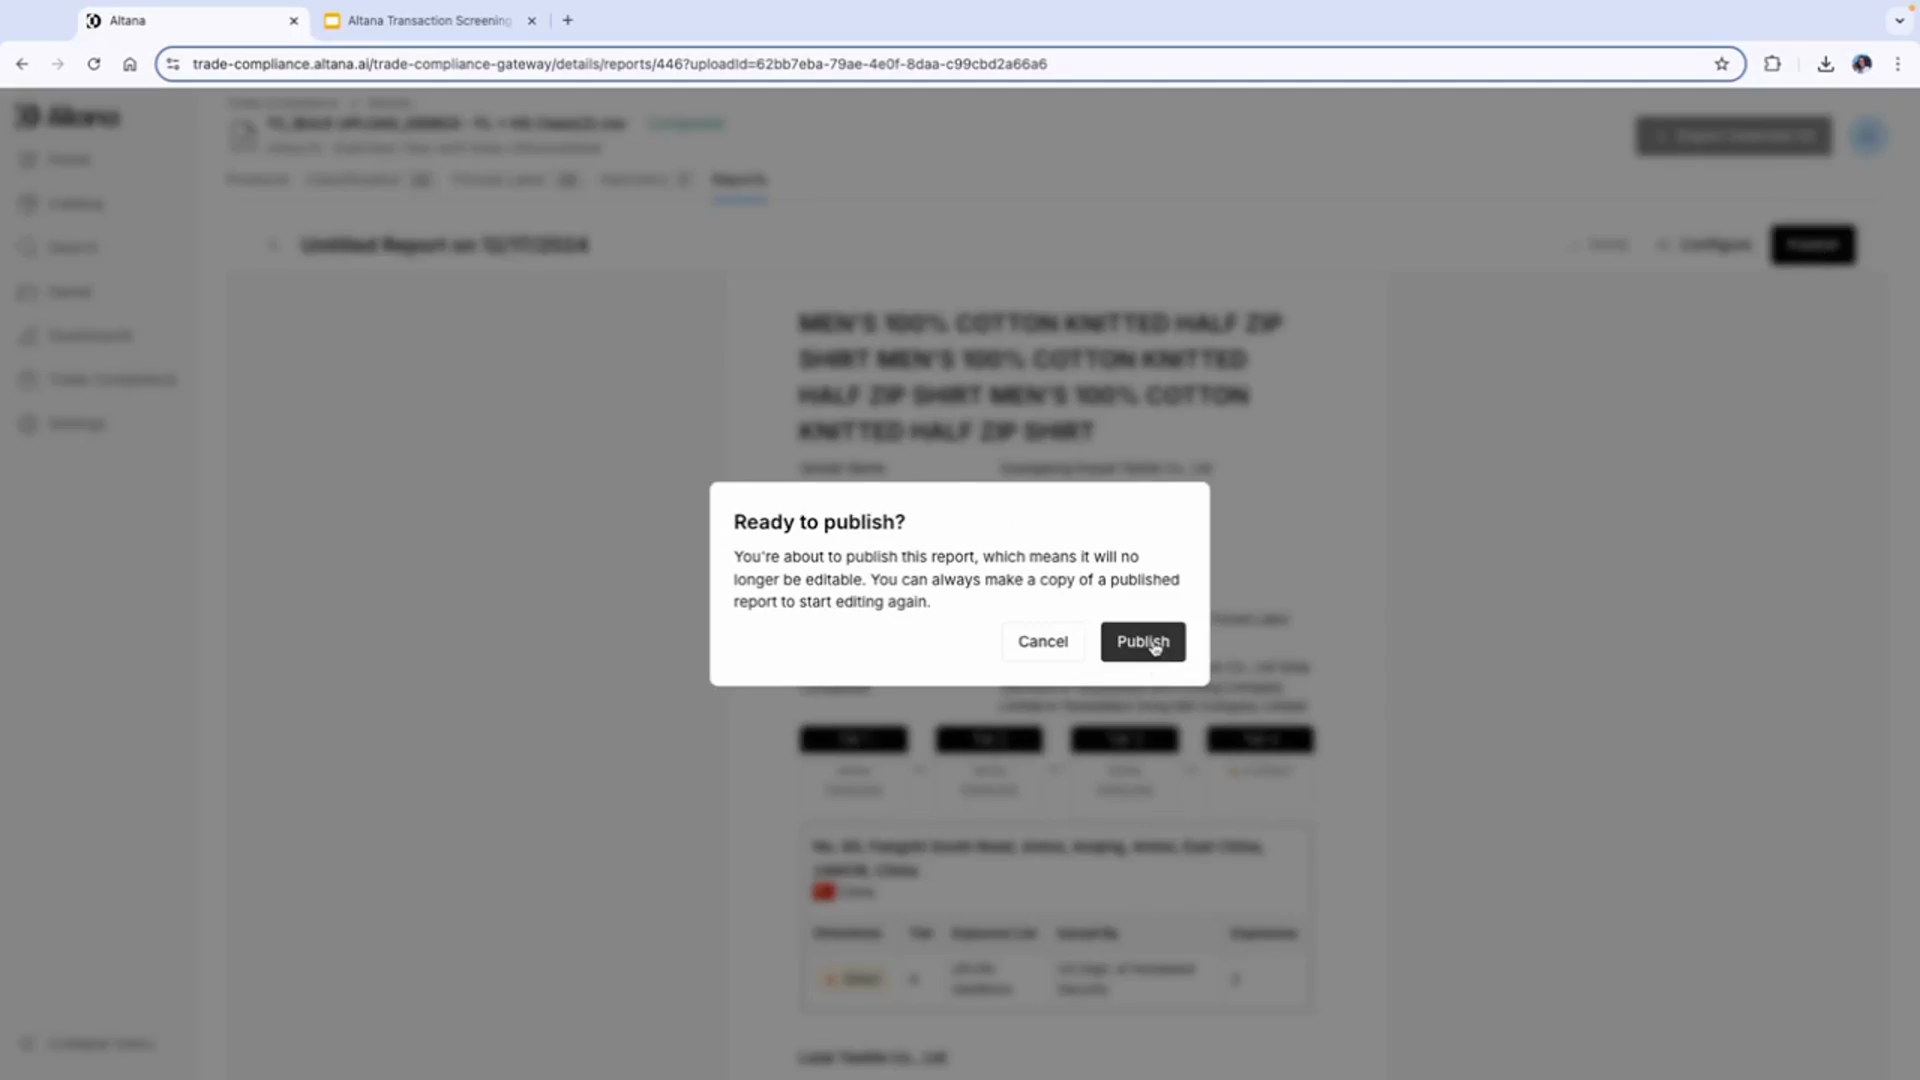
Step 10: Publish the report
Once you're done editing, publish the report. This locks the report, and it can then be shared internally via a link on the platform or exported as a PDF.
Step 11: Share the report with the customer
The customer can then view each exposure within the supply chain in detail, including the directness, the tier, the source of the exposure, and the location of each of the exposures.